The stone improves combat associated skills 20% faster. The Warrior skills are:
Block
Heavy Armor
One-Handed
Smithing
Two-Handed
Location
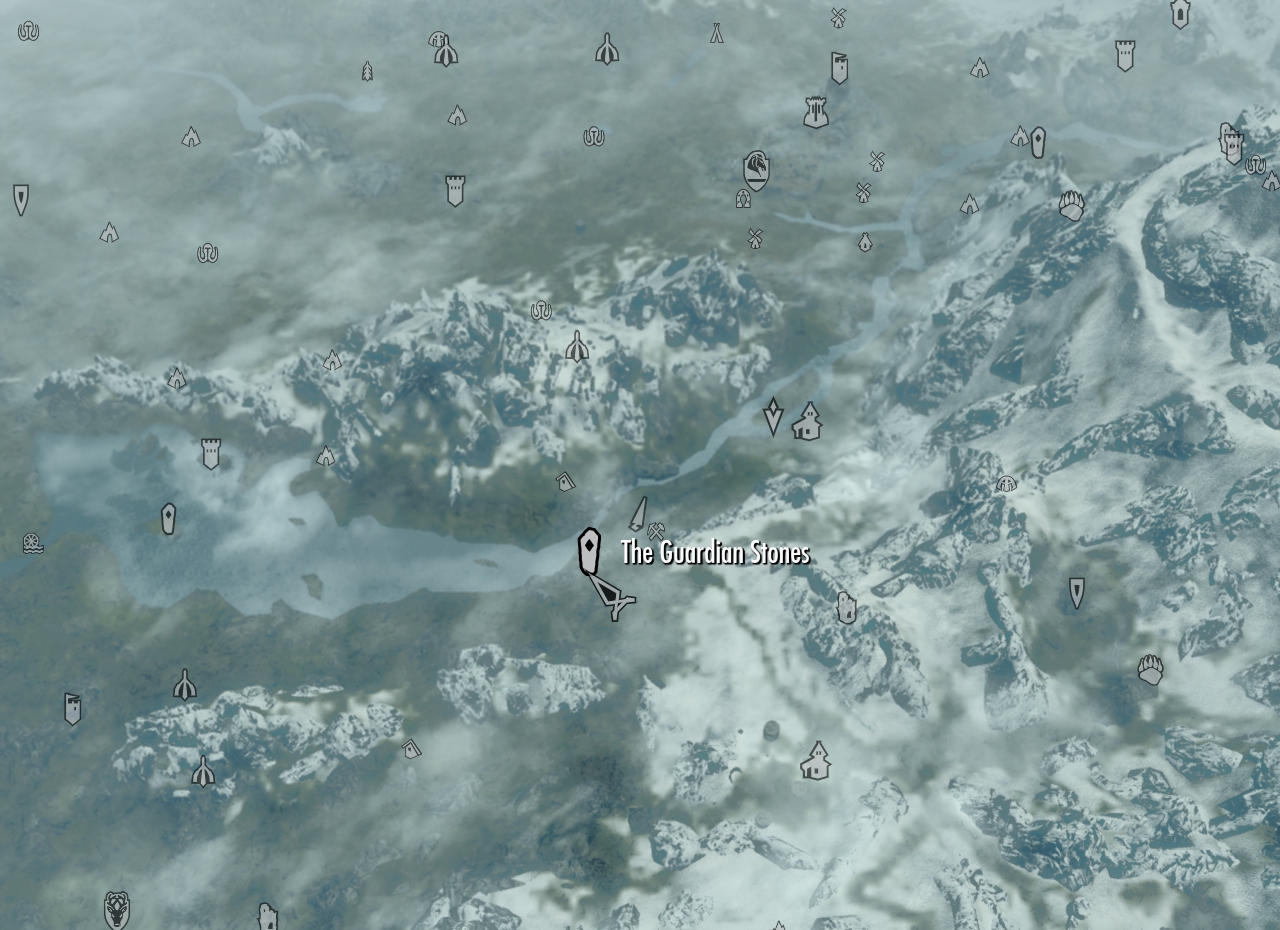
After completing Unbound, continue to follow either Ralof or Hadvar and they will lead you to it. It is located southwest of Riverwood, and north-northwest of Helgen close to the river.
The Mage Stone and The Thief Stone can be found at the same place.
Trivia
Despite Archery falling under The Warrior skill set, it is counted as a stealth skill and covered by The Thief Stone in this instance only. It is unknown if this is intentional or a bug.
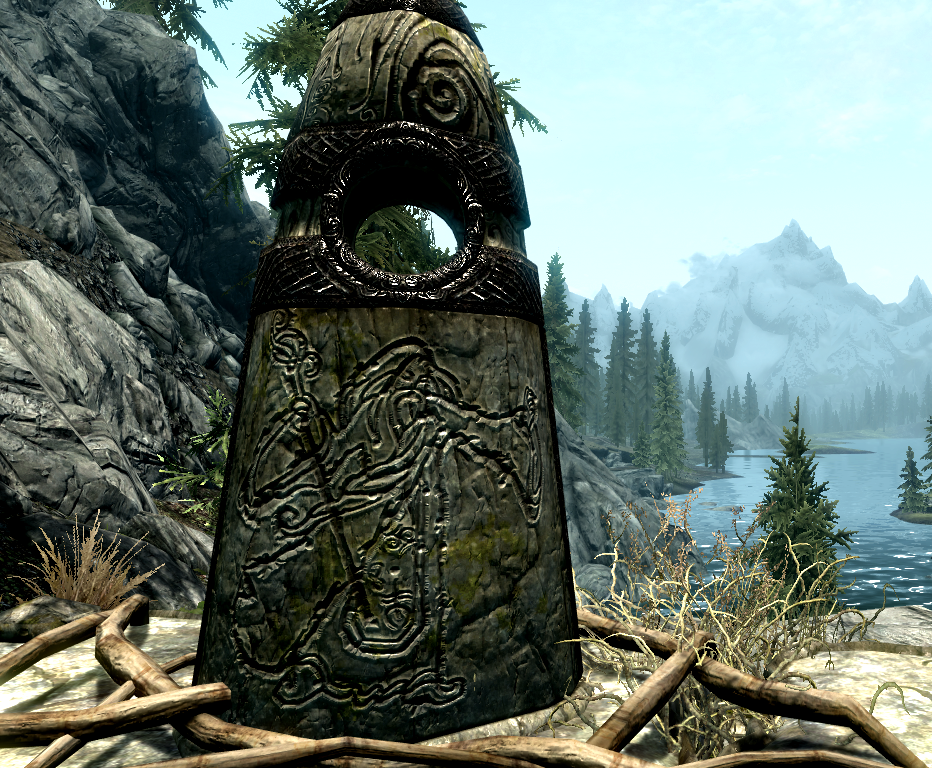
The Warrior Stone
Map
Constellation
Location
Southwest of Riverwood.
Description
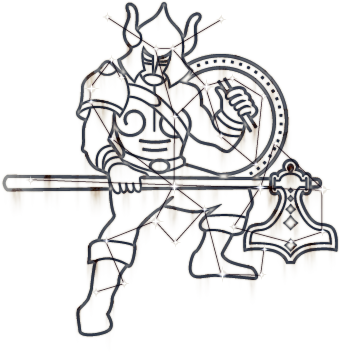
Those under the sign of the Warrior will learn all combat skills 20% faster.
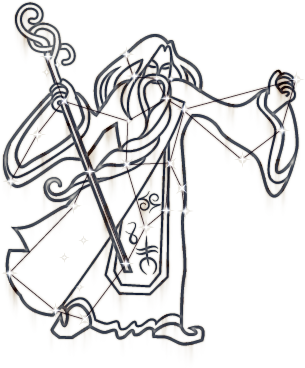
Those under the sign of The Mage will learn all magic skills 20% faster.
Effect
Learn magic skills 20% faster.
Location ID
GuardianStones
The Mage Stone is a Standing Stone located in The Elder Scrolls V: Skyrim. It is one of the first three Guardian Stones the Dragonborn can choose from.
Effect
The Mage Stone improves magic associated skills 20% faster. The Mage skills are:
After completing Unbound, continue to follow either Ralof or Hadvar and they will lead you to it. It is located southwest of Riverwood, and north-northwest of Helgen close to the river.
The Warrior Stone and The Thief Stone can be found at the same place.
Appearances
The Elder Scrolls IV: Oblivion (First appearance)
The Elder Scrolls V: Skyrim
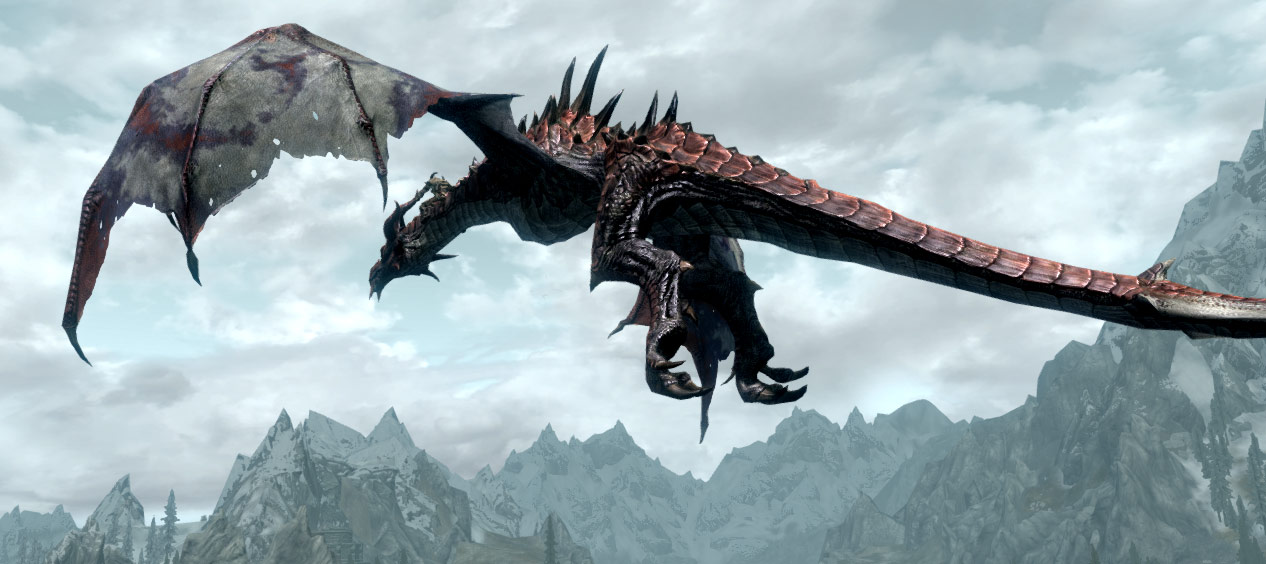
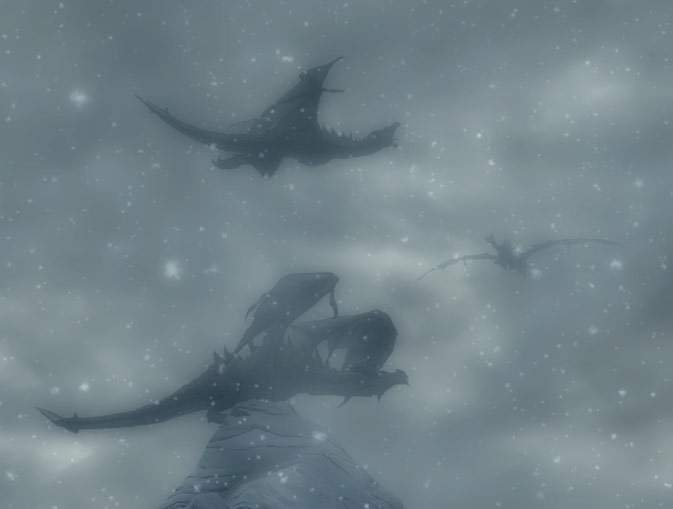
Paarthurnax and other dragons circling the Throat of the World.
Quest Giver
None
Location
Sovngarde and Skyrim
Prerequisite
Dragonslayer
Next Quest
Free Play
Reward
Main Quest Completion
Type
Main Quest
QuestID
MQ306
Shor’s Blessing
Once Alduin has been defeated, speak to Tsun. He explains that he can return the Dragonborn back to Nirn.
Upon accepting his offer, Tsun will grant the Call of Valor shout which can summon an ancient Nord hero to aid in battle. After learning the words of power, Tsun summons Shor’s might and returns the Dragonborn to the Throat of the World.
Tsun: “This was a mighty deed! The doom of Alduin encompassed at last, and cleansed is Sovngarde of his evil snare. They will sing of this battle in Shor’s hall forever. But your fate lies elsewhere. When you have completed your count of days, I may welcome you again, with glad friendship, and bid you join the blessed feasting. When you are ready to rejoin the living, just bid me so, and I will send you back.”
Dragonborn: “I’m ready to return to Tamriel”
Tsun: “Return now to Nirn, with this rich boon from Shor, my lord: a Shout to bring a hero from Sovngarde in your hour of need.”
Hakon One-Eye/Gormlaith Golden-Hilt: “All hail the Dragonborn! Hail him/her with great praise!”
Tsun: Nahl… Daal… Vus!
Return to Nirn
Upon arriving at the Throat of the World, Paarthurnax and many other dragons will be there to meet the Dragonborn. Paarthurnax sits atop the Throat’s Word Wall, greeting the player with grief.
Paarthurnax: “So, it is done. Alduin dilon . The Eldest is no more, he who came before all others, and has always been.”
You don’t sound very happy about it: “Happy? No, I am not happy. Zeymahi lost ont du’ol Barmahu . Alduin was once the crown of our father Akatosh’s creation. You did what was necessary. Alduin had flown far from the path of right action in his pahlok – the arrogance of his power. But I cannot celebrate his fall. Zu’u tiiraaz ahst ok mah . He was my brother once. This world will never be the same.”
I have no regrets. Alduin had to be destroyed: “Of course. Alduin nahlaan daanii. I would have not helped you if I thought otherwise.
I was just fulfilling my destiny as Dragonborn: “Indeed, you saw more clearly than I – certainly more clearly than Alduin.
Alduin brought this on himself: “Indeed. Alduin wahlaan daanii. His doom was written when he claimed for himself the lordship that properly belongs to Bormahu – our father Akatosh.”
Rok funta koraav . Perhaps now you have some insight into the forces that shape the vennesetiid… the currents of Time. But I forget myself. Krosis . So los mid fahdon . Melancholy is an easy trap for a dovah to fall into. You have won a mighty victory. Sahrot krongrah – one that will echo through all the ages of this world for those who have eyes to see. Savor your triumph, Dovahkiin. This is not the last of what you will write upon the currents of Time.
The conversation ends as Paarthurnax leaps off the wall and ascends to the skies.
Paarthurnax: “Goraan! I feel younger than I have in many an age.”
Paarthurnax then circles around and above the Wall, as do the other dragons.
Paarthurnax: “Many of the dovahheare now scattered across Keizaal . Without Alduin’s lordship, they may yet bow to the vahzen… rightness of my Thu’um.”
Paarthurnax pauses in mid-air, and will face the Dragonborn.
Paarthurnax: But willing or no, they will hear it! Fare thee well, Dovahkiin!”
Paarthurnax moves forward and, along with the other dragons, continues to circle around the Throat of the World. Eventually, he and the other dragons leave one by one. Next, Odahviing lands, greeting the Dragonborn.
Odahviing: “Pruzah wundunne wah Wuth Gein . I wish the Old One luck in his… quest. But I doubt many will wish to exchange Alduin’s lordship for the tyranny of Paarthurnax’s “Way of the Voice”.
As for myself, you’ve proven your mastery twice over. Thuri, Dovahkiin . I gladly acknowledge the power of your Thu’um. Zu’u Odahviing . Call me when you have need, and I will come if I can.
Odahviing then ascends high into the sky, and circles the Throat of the World alone. This marks the end of the main questline.
Return to High Hrothgar
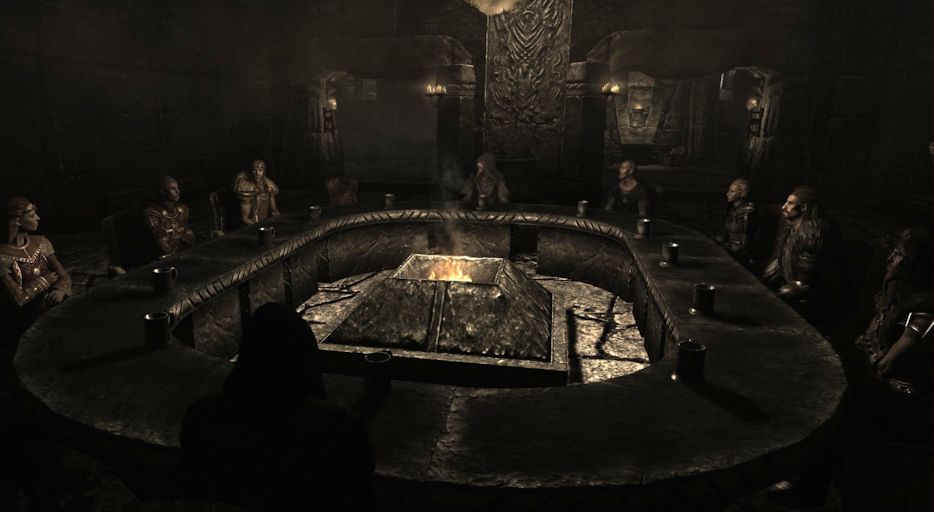
If the Dragonborn returns to High Hrothgar, the Greybeards will all be gathered at the conference table waiting for him/her. Arngeir will rise and address the Dragonborn.
“I can see it in your eyes. You’ve seen the land of the Gods and retuned. Does this mean… it is done? Is Alduin truly defeated?”
Yes. I went to Sovngarde and killed Alduin there: “At last. It is over. Perhaps it was all worth it in the end. You’ve shown yourself mighty, both in Voice and deed. In order to defeat Alduin, you’ve gained mastery of dreadful weapons. Now it is up to you to decide what to do with your power and skill. Will you be a hero whose name is remembered in song throughout the ages? Or will your name be a curse to future generations? Or will you merely fade from history, unremembered? Let the Way of the Voice be your guide, and the path of wisdom will be clear to you. Breath and focus, Dragonborn. Your future lies before you.”
Upon completion of this passage, if the Dragonborn speaks to Arngeir again, there will be a new dialogue option.
Is Alduin really dead? I didn’t absorb his soul when he died: “Perhaps, perhaps not. Dragons are not like normal mortal creatures, and Alduin is unique even among dragonkind. He may be permitted to return at the end of time to fulfill his destiny as the World-Eater. But that is for the Gods to decide. You have done your part.”
If Paarthunax was killed, it’s possible they will be inhospitable and won’t speak to the Dragonborn.
The Blades
Regardless of if Paarthurnax has been killed or not, the player can return to the Blades, where Esbern tells them Delphine has been worried about them since the rumors that they flew out of Whiterun on a dragon. The two are happy to hear that Alduin is dead and that the Dragonborn’s destiny has been fulfilled.
If Paarthurnax has not been killed, the two insist they are not ungrateful for all the player has done, but repeat that they must stay true to their oath as Blades, and so cannot aid the Dragonborn further until they kill Paarthurnax and close the pages on a dark chapter in history with the death of both brothers.
Alterations
Killing Paarthurnax
If Paarthurnax is killed before “Dragonslayer” is completed, the Epilogue’s script will not appear in-game. Therefore, when you return to the Throat of the World-several Dragons will fly overhead but Paarthurnax will not be there.
Calling Odahviing
If the shout “Call Dragon” is used, and Odahviing is summoned, talking to him will result in him admitting that he is no longer ashamed of his defeat, as not even Alduin himself could stand against the Dragonborn’s Thu’um, and that Alduin’s Lordship has been passed to the Dovahkiin.
Callback to the first meeting
If, during the Dragonborn’s first meeting with Paarthurnax, they stated that they do not believe in destiny, Paarthurnax will respond differently from if they said that they were just fulfilling their destiny as Dragonborn, reminding them of what they had said before. If they stated before that the next world will have to take care of itself and they state the world is better without Alduin, Paarthurnax will again recall their words.
Trivia
Before and after the Dragonborn speaks to Paarthurnax, the other dragons speak in their language. Here is what they say, in Dovah and English.
When you leave the Hall of Valor and cross the bone bridge, your next objective is to get rid of the mist in the valley. The three heroes will line up and you have to equip the Clear Skies shout.You need to use Clear Skies shout 3 times as Alduin will summon the mist 3 times.
Felldir: We cannot fight the foe in this mist! Gormlaith: Clear Skies – combine our Shouts!
<shout> Gormlaith: Again! Alduin: Ven Mul Riik! Felldir: We can shatter his power if we Shout together!
<shout> Alduin: Ven Mul Riik! Hakon: Does his strength have no end? Is our struggle in vain? Gormlaith: Stand fast! His strength is failing! Once more, and his might will be broken! Felldir: His power crumbles – do not pause for breath!
<shout>
Use it and the 3 heroes will use it as well. After Alduin summons the mist again, use it again until the heroes use it as well. Alduin will now summon the mist for the last time. After a small dialogue use the Clear Skies shout for the last time. This will get rid of the mist and Alduin will appear. It would be wise to save when he appears, so you won’t have to do all of this again if you die.
Alduin’s Fall
Now that Alduin has appeared it is your job to kill him. Use your Dragonrend shout on him as soon as possible. Attack him when he’s on the ground. Use your Dragonrend shout as much as possible to stun him and keep the other heroes alive. If you’re low-leveled and can’t kill Alduin before he “defeats” the other three heroes, be ready to use lots of healing potions or spells, as his fire breath attack is quite strong. A simple tactic to defeat Alduin is to use the same tactic you may have used against him in the fight at the Throat of the World. A shield bash/stun will stop him from using his fire breath along with using the unrelenting force shout, and in between shield stuns, it should be possible to get two to three swings with a weapon in. Between using Dragonrend and stunning him, it should be a simple matter of ensuring your life doesn’t drop too low from his physical attacks, and maintaining your stamina to use the shield bash.
Tsun: That was a mighty deed! The doom of Alduin encompassed at last, and cleansed is Sovngarde of his evil snare. They will sing of this battle in Shor’s hall forever. But your fate lies elsewhere. When you have completed your count of days, I may welcome you again, with glad friendship, and bid you join the blessed feasting.
All: All hail the Dragonborn! Hail him/her with great praise!
Tsun: Return now to Nirn, with this rich boon from Shor, my lord: a Shout to bring a hero from Sovngarde in your hour of need. Nahl…Daal…Vus!
Quotes
Nust wo ni qiilaan fen kos duaan.
Pahlok joorre! Hin kah fen kos bonaar
Zu’u lost kriaan hi ont, nu hin sille fen nahkip suleyki.
Zu’u Alduin, zok sahrot do naan ko Lein.
I have already defeated your friends once. Beyne
. I do not fear them.
Zu’u unslaad! Zu’u nis oblaan!
Notes
After Alduin appears, Hall of Valor will be locked, requiring a nonexistent key, and the Dragonborn cannot return, although beforehand the Dragonborn could enter without needing a key.
There is a brief moment where the option to loot Alduins body appears before he disintegrates, although he cannot actually be looted (it is possible, if you have Kahvozein’s Fang readied in your right hand, to harvest dragon heartscales).
When Alduin dies, the Dragonborn does not absorb his Soul. It is absorbed up into the vortex high above Sovngarde.
Any of the Lost Souls met en route to Hall of Valor might join your fight against Alduin if they follow the player or wander close enough.
Alduin’s fog shout “Ven Mul Riik” means “Wind Strong Gale” in the Dragons’ tongue.
After completing this quest, you can search for Torygg he will be somewhere in the valley (along with Ulfric or Rikke if you have finished the civil war quest line) if you choose not to immediately return to Nirn.
Climbing the mountains to the West leads to a great vast open snowy mountain tops and if continued will lead to a great cliff. This cliff is next to a vast ocean. Unknown (as of now) if there is anything out in it.
Bugs
360 PS3 Some of the optional Souls may cause the quest to glitch, not allowing you to help any of the other souls through the fog. This seems to happen mainly with the first Stormcloak you meet on the path.
PC 360 PS3 After the main quest has been completed, Radiant AI seems to increase all dragons spawning rate by almost 200% making fast traveling nearly impossible without encountering a dragon, it is unknown if this is a glitch.
After using Storm Call shout in Sovngarde the count down bar for shouting again becomes locked and will not let you clear skies to fight Alduin.
It’s possible to make returning to Skyrim impossible: Throw Tsun to the giant waterfall by making him follow you near the bone bridge. Talk to him so that he faces the opposite of the fall, and cast two-handed destruction spells to him (with Impact perk activated) so that he drops down below. If you try to follow, you’ll die instantly.
PS3 After using “clear skies” the required number of times, Alduin still does not turn up. Re-load earlier save files until he does.
Hall of Valor in Sovngarde (Shor’s Hall)When entering Sovngarde, walk down the stairs, and there will be a Stormcloak soldier. He’ll say that he can’t reach the Hall of Valor due to the deadly mist. In this mist, Alduin hunts for lost souls to gain power. After the conversation, follow the path through the mist. If you chose to help the Stormcloak, he will be devoured. Note: You can clear the mist using the Clear Skies shout.
Note: the soldier does not always start in the beginning, and there is a good chance the soldier will not be encountered until part way through the mist. Do not worry, the mist will not engulf you as you speak with the soldier.
If you have killed Ulfric, his soul will be here, saying “we can’t get anything done in this fog” and will tell you to turn back. Also, Galmar Stone-Fist can be found saying “Dragonborn, even in death you dog my steps?” “How come you’re here? The king of this realm will cast you out – cursed be your name by all sons of Skyrim, with scorn unceasing.”
Conversely, if you followed the Stormcloak quest, Rikke will be here if you killed her.
Also, If you have finished the Companions quests, Kodlak Whitemane will be wandering in the fog. Occasionally, you will also meet Ysgramor in the Hall of Valor.
If you’ve completed the Bards’ College quest Tending the Flames you can see Svaknir, who wrote the verse you retrieved, along your path.
Whalebone Bridge
Tsun guards the Whalebone Bridge
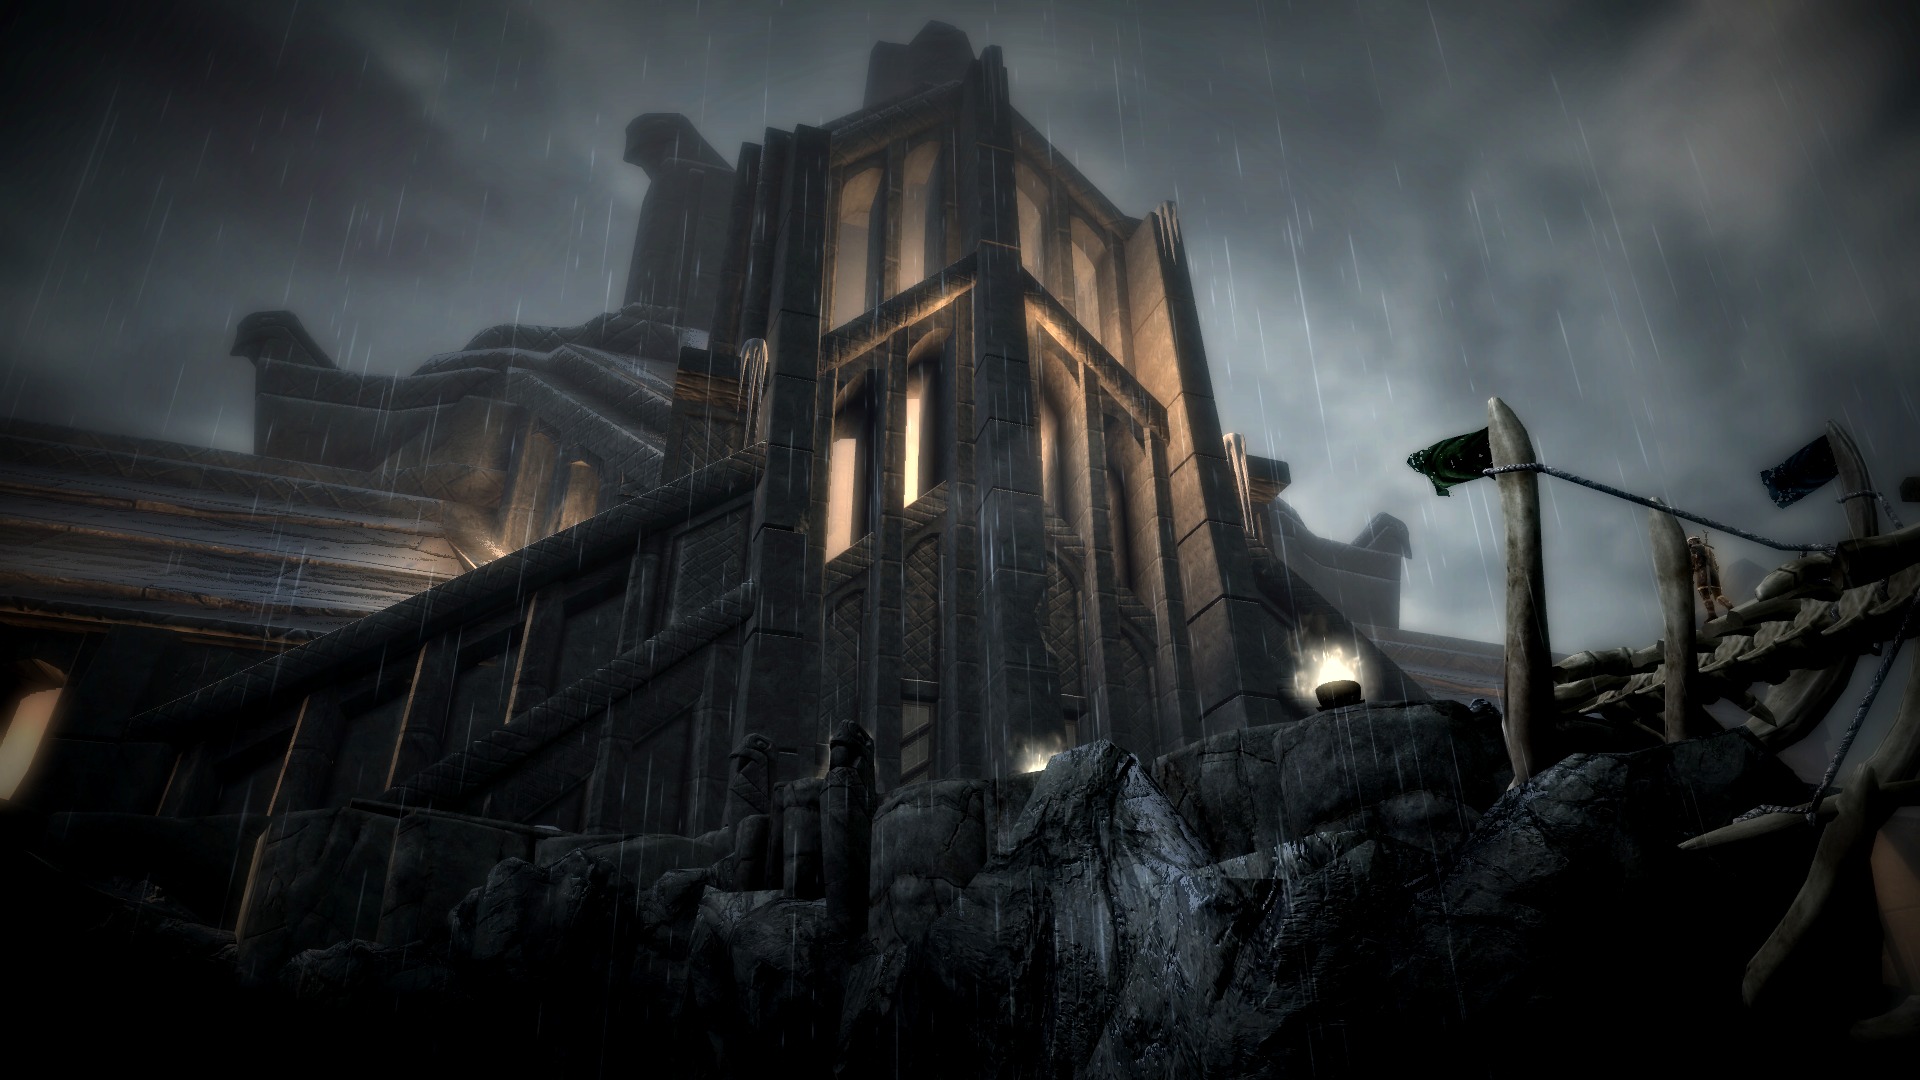
At the end of the path, the Hall of Valor comes into full view. The majestic building is situated at the far side of a great chasm that can only be reached by crossing the Whalebone bridge.
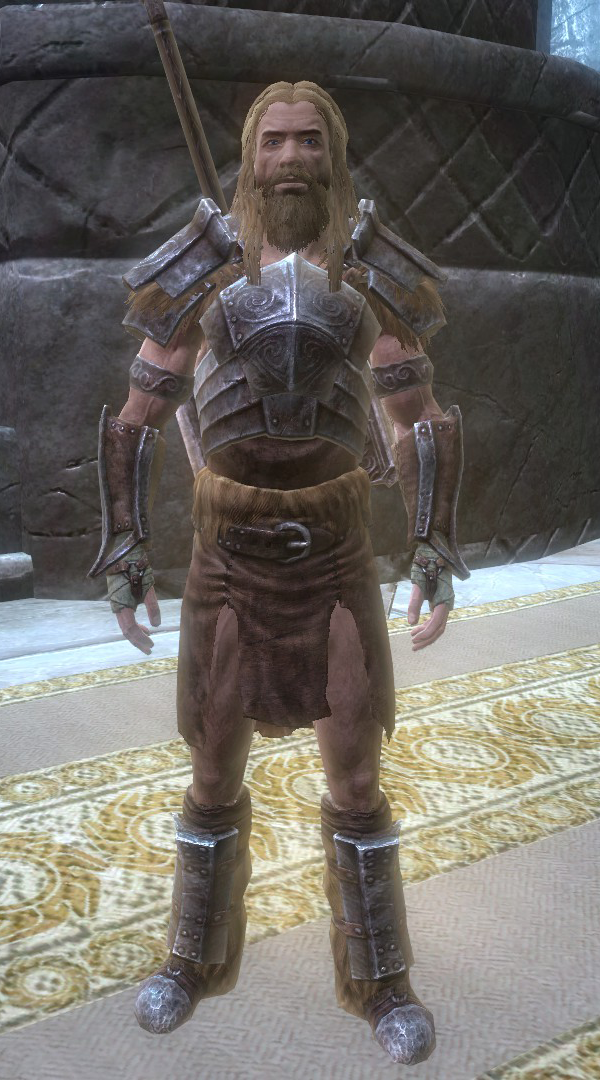
In front of the bridge stands Tsun, the Nordic god of trials against adversity who will begin the following dialogue when approached:
“What brings you, wayfarer grim, to wander here, in Sovngarde, souls-end, Shor’s gift to honored dead?”
Who are you?
I pursue Alduin, the World Eater.
I seek entrance to the Hall of Valor.
The first two questions give some background about Tsun and his relationship wiith Shor. He also gives some insight into the current situation in Sovngarde:
Who are you?:“I am Tsun, shield-thane to Shor. The Whalebone Bridge he bade me guard and winnow all those souls whose heroic end sent them here, to Shor’s lofty hall where welcome, well earned, awaits those I judge fit to join that fellowship of honor.”
I pursue Alduin, the World Eater:“A fateful errand. No few have chafed to face the Worm since first he set his soul-snare here at Sovngarde’s threshold. But Shor restrained our wrathful onslaught – perhaps, deep counselled, your doom he foresaw.”
In the last question, Tsun asks why he should allow the Dragonborn entry into the Hall of Valor. The right of birth will always be available, however the other options will only appear if the respective guild questlines have been completed:
I seek entrance to the Hall of Valor:“No shade are you, as usually here passes, but living, you dare the land of the dead. By what right do you request entry?”
By right of birth. I am Dragonborn.
“Ah! It’s been too long since last I faced a doom-driven hero of the dragon blood.“
By right of glory. I lead the Companions of Jorrvaskr.
“I welcome the chance to challenge the blade of Ysgramor’s heir, honored shield-brother/sister to Kodlak Whitemane, whom I’ve watched for in vain.”
By right of cleverness. I am Master of the College of Winterhold.
“Well met, mage of Skyrim. The Nords may have forgotten their forefathers’ respect for the Clever Craft, but your comrades throng this hall. Here in Shor’s house we honor it still.“
By right of blood. I Listen for the Night Mother.
“You tresspass here, shadow-walker. Shor does not know you. Perhaps before the end you will earn the right to pass this way. Welcome I do not offer, but your errand I will not hinder, if my wrath you can withstand.“
By right of plunder. I am a Nightingale of Nocturnal.
“Do not mistake the night-shrouded thief’s stealthily-taken spoils, stolen and unearned, for a warrior’s plunder, won in honorable battle. Your doom already binds you to your dark mistress, but your errand I will not hinder, if my wrath you can withstand.“
Once he remarks about the Dragonborn’s right of entry, a final question is asked:
Can I enter the Hall of Valor?: “Living or dead, by decree of Shor, none may pass this perilous bridge ’till I judge them worthy by the warrior’s test.”
This propmts a battle with Tsun. When his health reaches about 60%, he will yield and allow you to cross the bridge to the Hall of Valor. If you try to skip the test, you will die when you walk on the bridge – even if you have god mode on with console commands.
If you use mist form as a vampire lord during this battle he will yield and allow you to cross
Hall of Valor
Ysgramor in Sovngarde.Upon entering the Hall of Valor, Ysgramor himself will greet the Dragonborn:
sgramor: “Welcome, Dragonborn! Our door and stood empty since Alduin first set his soul-snare here. By Shor’s command we sheathed our blades and ventured not the vale’s dark mist. But three await your word to loose their fury upon the perilous foe. Gormlaith the Fearless, glad-hearted in battle; Hakon the Valiant, heavy-handed warrior; Felldir the Old, far-seeing and grim.”
He will instruct the Dragonborn to speak to Gormlaith Golden-Hilt, Hakon One-Eye and Felldir the Old – the three heroes who defeated Alduin in the past. Approaching them will initiate the following dialogue:
Gormlaith:“At long last! Alduin’s doom is now ours to seal – just speak the word and with high hearts we’ll hasten forth to smite the worm wherever he lurks.”
Felildir: “Hold, comrades – let us counsel take before battle is blindly joined. Alduin’s mist is more than a snare – its shadowy gloom is his shield and cloak. But with four voices joined, our valor combined, we can blast the mist and bring him to battle.”
Hakon: “Felldir speaks wisdom – the World-Eater, coward, fear you, Dragonborn. We must drive away his mist, Shouting together, and then unsheathe our blades in desperate battle with our black-winged foe.”
Gormlaith:“To battle, my friends! The fields will echo with the clamor of war, our wills undaunted.”
Shor’s Hall, reserved of the honored dead.
Once their speech is completed, they will ready their weapons and charge outside to face Alduin. This complete the quest and begins Dragonslayer.
Gallery
Trivia
Sovngarde resembles Asgard in Norse mythology while the Hall of Valor resembles Valhalla, a giant eating hall reserved for warriors who had died valiantly.
When encountering the Stormcloak Soldier in the mist the player has the option of leading him through the mist to the Hall of Valor. But halfway through the mist, Alduin can land and grab the soldier, and throw him – seemingly killing him (again).
The Stormcloak Soldier is technically dead as soon as Alduin touches him, made apparent by the fact that he is lootable if activated immediately (tested PC only).
There is a Dragon Wall along the path through Sovngarde. It is blocked off with stone rubble, however, it is smaller than normal ones and even after Alduin’s defeat, it appears to be inactive and unreachable.
The player will recognize some of the characters they meet in Sovngarde from either hearing about them or knowing them before their death in the story. Some examples of this are Ysgramor, Kodlak Whitemane (If the Companions storyline is complete), Ulfric Stormcloak and Galmar Stone-Fist (if the Civil War questline is complete and the player sided with the Imperials), and Legate Rikke (If the Civil War questline is complete and the player sided with the Stormcloaks). Other named characters inside the Hall include High King Torygg, Jurgen Windcaller, Olaf One-Eye, Ulfgar the Unending, Erlendr, Nikulas and Hunroor.
Other characters, all labelled “Hero of Sovngarde”, will be wandering around the great feast hall remarking upon the food and mead, boasting of heroic deaths, and will particularly note that their god is absent, as his light would blind the player (who is still valiantly mortal). The food in Sovngarde can be taken or eaten by the player, the god’s throne sat upon without incident, and the Ox Head at the feast can be taken as well (although it’s not actually edible).
There are references to Bloodmoon’s quest Betrayal at Brodir Grove. The character you kill to grant him entrance to Sovngarde in that quest is Ulfgar the Unending, who is one of the NPC heroes in the Hall of Valor. Erlendr, Hunroor, and Nikulas, are the three standing stones at Brodir Grove.
Out of all the characters that can be found in Alduin’s mist Kodlak Whitemane and Ulfric Stormcloak (or Legate Rikke, depending on the dragonborns side in the war) will be seen after Alduin is defeated. This indicates that the other souls were likely to have been devoured by Alduin.
If you freed Svaknir during the Bards’ College questline, Olaf One-Eye will speak to you about your deed. “You freed Svaknir, a fool of a poet, but an honest enemy who has earned my respect.” “Sadly, he’s now lost in the soul-snaring mist – defeat Alduin, and his doom avert – I hope to greet him in this Hall as a friend.”
If the player finished the guild questline for the Companions, College of Winterhold, Dark Brotherhood, Nightingales, the Blades, or the Thieves Guild, the player can tell Tsun that he/she wants to cross the bridge to the Hall of Valor for a different reason other than being Dragonborn.
If returning to The Hall of Valor during the fight with Alduin, the entrance has been locked.
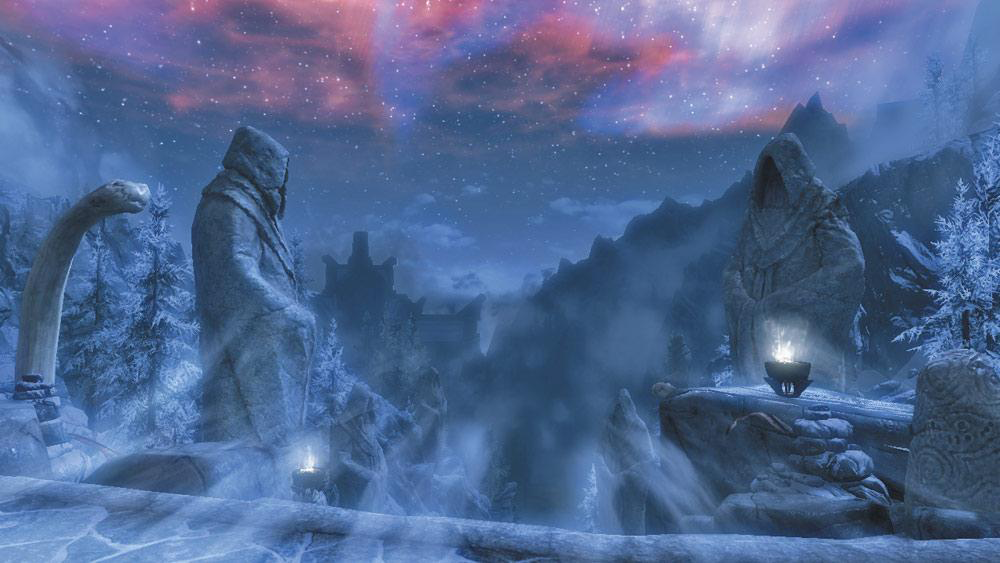
Sovngarde’s sky resembles the Skills menu, as the scenery displays the Warrior in Red, The Thief ‘in’ Green, and the Mage in Blue. You will not see your Perk trees though.
If you try to get to the Hall of Valor before fighting Tsun you will be killed either by lightning strikes or by instant death when reaching the end of the bridge.
After acknowledging Tsun, if the player jumps from the bone bridge, the player will have an instant death at half way (this will happen even if the player uses “Become Ethereal” shout)
Before completing The Companions quest line, Kodlak Whitemane can be heard saying “Sometimes I dream about the mists of Sovngarde”, a reference to this mission.
There is a unique soundtrack during this quest, which resembles the chanting of the Dragonborn Theme, only darker and slower. However, there is no unique battle soundtrack.
At the end of the quest, before Tsun sends the Dragonborn back to Skyrim, he says, “Perhaps one day we will meet again, and I will bid you join the feasting.” He says this regardless of the Dragonborn’s race, even though Sovngarde is reserved for Nords. This could be due to the fact that the Dragonborn just defeated Alduin.
Bugs
PC Tsun might be ‘invincible’ at some versions of the game, e.g. He’ll be bending down on the verge of death with a few strikes but does not yield.
PC Solution: use console command setstage MQ304 150. This will make Tsun “acknowledge” you and allow you to pass into the Hall of Valor.
Mist failing to render properly.
PC The mist may either disappear entirely or appear as a very patchy and crude-looking mask over the player’s view, ruining the effect. (Observed on a system with an Nvidia GeForce GTX 560 Ti immediately after the upgrade to driver version 285.62 and confirmed still not working on beta driver version 295.51, February 20, 2012.)
PS3 As you run along the path with all of the mist, it is possible that the mist will disappear as you run.
360 Sometimes if you run past Tsun onto the bridge without defeating him it will state in your quest log that you have defeated him and he will stop attacking you.
Progress in storyline
Nahkriin
Storm Call (shout, one word)
Type
Main Quest
QuestID
MQ303
Background
Alduin’s right-hand dragon Odahviing has revealed that Alduin has escaped to Sovngarde, the Nord underworld, where he feeds on the souls of the dead. His portal to Sovngarde is located in the ancient dragon temple of Skuldafn, high in the Jerall Mountains. The only way to reach it is to set Odahviing free so he can fly the Dragonborn there.
Walkthrough
Freeing Odahviing
The only way to reach Sovngarde’s portal is to fly on Odahviing. Freeing him can be done by talking to the guard, located on the second floor. The trap can also be released by pulling the chain. Odahviing will then propose to carry the Dragonborn to the Jerall Mountains. Followers cannot accompany the Dragonborn to Skuldafn; this includes Dead Thralls who will not be there when the Dragonborn returns, so if they’re being used as “walking trunks”, a wise Dovahkiin will take them home, kill them and stow the loot there. Although, if Bound Until Death has been completed, they could summon the Spectral Assassin to use as company. If the Assassin dies or disappears during the quest, he can be summoned again at least one day later, even if he is so far away as outside the actual Skyrim world. It is highly recommended that one holds off on heading to Skuldafn until they are ready. Once Skuldafn is reached, there is no turning back, as fast travel is impossible.
Skuldafn Temple’s Courtyard
As soon as the Dragonborn arrives to Skuldafn, it is likely that they will encounter a leveled dragon. Draugr will also be guarding the temple and must be dealt with or sneaked past. Another dragon will be waiting further ahead. A treasure chest is located to the left of the Temple’s entrance.
There is only one fixed dragon (Fire) encounter here. The other dragon battle outside is a random encounter and may not be present. There are also two optional areas (Skuldafn South Tower and Skuldafn North Tower). These contain random treasures as well as draugr to fight.
Skuldafn Temple
First Puzzle Room:This puzzle is made of three pillars with three sides each: the first depicting a bird, the second a snake, and the third a whale. Two different combinations each open a different gate. The gate to the right contains a treasure chest, the one to the left opens the way to the rest of the temple. When looking at the puzzle from the lever, the left pillar’s wall-facing side should depict a snake (facing the matching plate on the wall), the right pillar should have a whale facing the other wall with the matching plate. The center pillar dictates which gate opens. The gate on the right must be closed before the left gate will open. The bird opens the right gate, while the snake opens the left gate. Standing at the lever facing the pillars, this is what should be seen:
[Bird] [Bird] [Bird] – Opens Right Side Gate
[Bird] [Snake] [Bird] – Opens Left Side Gate
The lever should be leaning towards the pillars before the pillars are spun into place. Then activate the lever to face towards the doors. If it is not done this way the doors will not open.
Second Puzzle Room: The correct symbols are above the alcoves where the pillars are located; the one in front of the door entered, the second up the stairs to the right and lastly the third across the walkway to the left. The pillar located immediately in front of the door should be set to snake, the pillar to the right set to bird, and the one to the left should be set to whale. The puzzle can be bypassed by using the Whirlwind Sprint shout while on the platform near the lever, or by jumping across.
Third Puzzle Room: In a hallway, the Dragonborn will have to face a leveled draugr or Dragon Priest. The Diamond Claw should be looted from his dead body. Like all the dragon claws, the puzzle door’s key is found on the claw’s palm. It is, from the top to the bottom: [Fox]-[Moth]-[Dragon]
A word of the Storm Call shout is on a Word Wall found after opening this door. As the Dragonborn can never return to Skuldafn, don’t miss this Word of Power.
The dragons near the portal.
Entering Sovngarde
Passage to Sovngarde on top of SkuldafnOn the roof of Skuldafn Temple, there is one elder dragon and one leveled dragon on each side of the portal, as well as four leveled draugr. By luring the deathlords close to the edge of the roof, it is possible to knock them off with Unrelenting Force. If done quickly, they can be run around while the shout recharges and be thrown off one or two at a time. The dragons will remain neutral unless provoked with Dragonrend, an attack, or transforming into a Vampire Lord or werewolf.
A dragon priest is just ahead of the dragons’ pillars. The priest’s name is Nahkriin, and his staff is the key to going to Sovngarde. After killing him, his Dragon Priest Staff can be looted from his body. This is also the only opportunity to get his mask. To enter Sovngarde, his staff must be used on the altar, before jumping into the portal.
Tactics to defeat Nahkriin
Nahkriin can be difficult for lower leveled characters, especially those who are not resistant to frost damage. Nahkriin relies heavily on ranged attacks and will, at all times, keep his distance. In some cases, he will also cast a cloak spell and conjure a frost atronach before the fight, as a form of defense against melee-oriented foes, which means that attacks should be carefully planned. He may also cast Ice Spike, slowing the Dragonborn drastically for a short period of time, leaving him more vulnerable to attacks. Like every other dragon priest, Nahkriin wields a high-leveled staff, and having a good amount of healing potions might be necessary for this fight, and later on for Sovngarde. A few methods can be used to make the fight easier:
The Shadow Stone can be used to turn invisible, allowing the Dragonborn to sprint into the portal before it is closed without confronting Nahkriin. An invisibility potion can also be used, or the Whirlwind Sprint shout to get into the portal past Nahkriin. This will make Nahkriin’s Dragon Priest Mask unobtainable.
Because Nahkriin will never confront the Dragonborn in melee range, he can be killed by hiding behind the pillar, near the edge of the large stairs. Nahkriin will only attack when the Dragonborn gets out of his cover. A bow can then be used to slowly decrease his health, hiding behind the pillar after every few shots.
Nahkriin can also be lured over the edge, and charged with a melee attack, causing him to fall off the edge and die. Shouts can be also be used, such as Fire Breath. This is not recommended, as then Nahkriin will have likely grabbed the staff, making it hard to enter Sovngarde
Nahkriin can also be sneak killed. A high Sneak level is necessary, and muffled boots are recommended. Nahkriin will appear facing the portal to Sovngarde, but, if he does not notice his foe, a sneak attack can be made. It is advised to have either the Backstab, Assassin’s Blade perk, or a high Archery level with a powerful bow.
Attacking with quick magic attacks, such as firebolt work well, then switching to melee force him to move, therefore lowering the chance of a hit from his attack. Then close the distance and use power attacks to stagger him, shouts help as well.
One way to kill Nahkriin and get his staff is to run up the stairs and use the shout Frost Breath, then run in front of him keeping him from getting the staff. Hit him until he has one life left, then if shouts haven’t recharged, stand there till it does, the equip Slow Time or Whirlwind Sprint, let him get the staff, then hit him, loot his body and use Whirlwind sprint before the portal closes.
Nahkrin will initially be moving toward the portal. Run past him and get between him and his staff. He can then be melee attacked till he dies, as he will not fight back until he gets his staff.
Finally, there is a way to come up to Nahkriin and he will not be hostile, even if attacked. When coming out of Skuldafn Temple to Skuldafn there is a wooden bridge directly outside, if the Dragonborn heads to the right and climbs the rocks, it is possible to come out at the side of Nahkriin without making him hostile. With 100 sneak it will still show that the Dragonborn has been detected but Nahkriin will not attack, even if attacked, making him easy to pick off with a bow. Using this method it is not possible to get the staff however, as it will already be in place with the portal open.
Sprint up the stairs to Nahkriin, get him in range for Unrelenting Force. With him staggered by the Thu’um, sprint towards him into melee range. Bashing and power attacks stagger him, so keep doing so before he picks up his staff.
A quick way to kill Nahkriin is: if you have the Sanguine Rose, summon the Dremora near Nahkriin and then pick him off using a bow.
If one has obtained Windshear, one could chain stun Nahkrin until he dies. Windshear is only obtainable if one has progressed to the end of the Dark Brotherhood quest line.
Another tactic similar to the Windshear stratagy above, is to get the “Impact” Perk for destruction magic. It is possible (if you have enough mana or fast enough regen) to repeatedly stager him with most duel cast with any magic other than Sparks, Frostbite, or Flame as they are not “power attacks” and thus do not cause stagger when duel cast.
Bugs
This section contains bugs related to The World-Eater’s Eyrie. Before adding a bug to this list, consider the following:
Confirm all bugs with other editors on the talk page before adding them below.
Always try reloading an old save first, before asking for assistance.
Don’t discuss possible bug fixes or origins. Leave those and all other first-person-anecdotes on the talk page, not the article.
Always add 360 , PS3 , and PC to clarify which system the bug appears on.
360 PS3 It is possible for the first Skuldafn puzzle room to glitch, not allowing the middle pillar to rotate at all and thus not allowing the door to open. Reloading from a save outside the temple appears to fix this. It may be possible to load a save from inside the temple, before solving the puzzle, as long as the puzzle to open the left-hand door is solved (leaving the chest).
PC 360 PS3 The puzzle with the Diamond Claw won’t open even after inserting the right sequence. Reloading to a save or leaving the temple and reentering the sequence may fix this. Another possible fix is to enter the correct sequence, try the claw, turn all three rings once, try the claw, and continue until the correct sequence is reached again. Also, it is possible that the rings may not turn at all, leaving through the last autosave door and returning may fix this.
If Odahviing is attacked when he is captured, without having talked to him, he will attack the Dragonborn when he is released. Reloading and capturing him again will fix the bug.
If Odahviing’s health is depleted before he is trapped, he will stand in a place for a moment, regenerate his health to full points and attack the Dragonborn again. It is not possible to kill him.
If the Dragonborn dies after riding Odahviing, he may appear near a river below Dragon’s Reach, but he is unreachable. If the game has been saved before riding him, then the Dragonborn may not be able to talk to him or move. This bug has yet to been fixed.
If the dragon priest is killed before he grabs the staff, the seal may never be activated.
PC 360 PS3 The last two dragons may become stuck in a loop if Dragonrend is used on either of them after killing the dragon priest.
PC 360 PS3 On the roof of the Skuldafn Temple there is a pillar that does not touch the ground in the center of the back wall, this is not significant in any way other than the fact that its a bug.
360 It is possible that the dragons on the roof may attack without provocation.
Allies with the Blades
Ability to recruit followers for Blades
Faction
Blades
Type
Side Quest
QuestID
MQPaarthurnax
Background
Delphine and Esbern have learned of Paarthurnax’s position as leader of the Greybeards. They inform the Dragonborn of Paarthurnax’s role as Alduin’s second-in-command during the Dragon War and his responsibility for the atrocities committed. Bound by their oaths as Blades, they cannot offer the Dragonborn further assistance until Paarthurnax is slain. This quest is optional; it does not need to be completed in order to finish the main quest.
Overview
This quest is purely optional. In order to continue Blades storyline, it must be completed before the conclusion of the Main Quest. However, doing so will prevent any further communication with the Greybeards, including the radiant quest to locate Words of Power. Players who decide to kill Paarthurnax, however, receive a different conclusion to the main storyline.
Killing Paarthurnax
He should be very easy compared to Alduin. Dragonbane is useful here as always. Dragonrend will bring Paarthurnax to the ground, and Fire Breath is useful for damaging Paarthurnax.
How NOT to kill Paarthurnax (PC only)
It is possible to complete this quest without needing to slay Paarthurnax by using command
This way, Paarthurnax will remain alive, the Greybeards will still be hospitable and the Blades will talk once more.
There are also mods available to bypass this quest or the player could use the console command (setessential <baseID> 0) and kill the Blades instead.
Trivia
Speaking to Arngeir regarding the Blades’ request, he will tell the Dragonborn about Paarthurnax’s reason for siding with Alduin and later, his rebellion which brought to Alduin’s first demise. There is the option to tell Arngeir, Paarthurnax must die or that he is going to be spared. This will affect the conversation between Esbern and Arngeir if in Season Unending, during the negotiation of a treaty.
Should the Civil War questline be complete (thus bypassingSeason Unending ) and the player proceeds directly to the endgame, Delphine and Esbern will remain in Sky Haven Temple. However, they remain in disapproval and the quest disappears from the log.
There is no actual way of denying the request of the Blades, other than console commands/mods on the PC.
Without Arngeir, it is still possible to get radiant quests for words of power by shouting in a town and waiting for a Letter from a Friend.
This quest is still possible to complete after completing Season Unending by depleting all of Paarthurnax’s health then quickly fast traveling to Sky Haven Temple.
It is possible to kill Paarthurnax dirrectly after the quest, Alduin’s Bane, since he is no longer an essential character. Once he is dead, travel to Sky Haven Temple and talk to Esbern. He will introduce the Dragonborn to the quest to kill Paarthurnax, but you can tell him Paarthurnax is already dead. (Also, this will NOT interfere with the Peace Treaty mission at High Hrothgar later.
Bugs
This section contains bugs related to Paarthurnax (Quest). Before adding a bug to this list, consider the following:
Confirm all bugs with other editors on the talk page before adding them below.
Always try reloading an old save first, before asking for assistance.
Don’t discuss possible bug fixes or origins. Leave those and all other first-person-anecdotes on the talk page, not the article.
Always add 360 , PS3 , and PC to clarify which system the bug appears on.
PC 360 PS3 Paarthurnax is invincible, immediately after receiving the quest because he is perched on the altar. However, this can be exploited to level up one’s skills. Possible solutions are as follows:
Solution: Reload a previous save. Also, do not engage in conversation before killing him.
PC 360 PS3 Solution: Get your follower to attack him. Paarthurnax will fly up and get into an attack position; from there you can kill him.
360 Follower says that attacking Paarthurnax is “not possible” so the above option may not work.
Solution: Use Dragonrend and attack a few times.
Solution: Keep attacking Paarthurnax until his health runs out, even if he never leaves his perch. Once his health runs out, it will start regenerating. Fast travel somewhere, and, when it loads, it should say that you killed Paarthurnax.
Solution: Do not use Dragonrend on Paarthurnax; let him fly off. If he doesn’t fly off, try using ranged attacks (magic may work more often).
Solution: Attack Paarthurnax with Mehrune’s Razor (possibly due to the instant kill enchantment on the blade) which entices him to reciprocate combat and attack you.
Solution: Attack him with Paralyze while not sneaking. He will leave the altar and will then become killable.
Solution: Shoot him with a Ebony Bow and a Elven Arrow while sneaking.
Solution: Get Paarthurnax off of the altar.
PC 360 PS3 Solution: Once you have returned to the Throat of The World after defeating Alduin, speak with Paarthurnax. After a brief dialogue, he will begin to fly away. Once he is hovering in the air saying his final farewells, attack him a couple times, and he will become a killable target and will try to fight you. This method allows you to complete the main quest line and also continue the Blades quest line at the same time.
360 PS3 The quest will disappear from the journal.
Solution: Attack and kill him. However, in some cases Paarthurnax will remain invincible even after the quest has disappeared, preventing further progress in the Blades storyline.
PC 360 PS3 After the first fight with Alduin, you must speak with Paarthurnax; after initiating dialogue with him, he may randomly fly into the air and spin in circles while dialogue remains active. He will get too high and you won’t know what he is saying without subtitles.
Solution: Exit the dialogue and go back to Paarthurnax later.
After you have finished the main dragon questline, you will most likely still encounter this glitch although his dialogue will vanish.
If you finish the civil war quests and skip Season Unending you must go to Sky Haven Temple and talk to Esbern or Delphine for this quest to trigger. (DO NOT think this is a way to be able to talk to both Blades and Greybeards forever; the second you walk into Sky Haven Temple after The Fallen you are not a member and taking items is theft.)
It is possible if you try to defeat Odaviing before finishing this quest. Odhaviing will be invincible, therefore making it impossible to progress further unless you kill Paarthurnax first.
This quest starts immediately after the quest Alduin’s Bane is complete. However, it will be put on hold shortly after it starts for Season Unending if the Civil War questline is incomplete or not started.
Background
After I defeated Alduin at the top of the Throat of the World, he fled from me. One of his dragon allies may be able to tell me where he’s gone. With the help of the Jarl of Whiterun, I’ve trapped Odahviing in Dragonsreach. Odahviing revealed that Alduin’s lair is located in the ancient temple of Skuldafn, which is only accessible by air. Odahviing has offered to take me there, in return for his freedom.
Objectives
Learn shout to call Odahviing
Prepare the trap
Call Odahviing to Dragonsreach
Defeat and trap Odahviing
Interrogate Odahviing
Walkthrough
After you have concluded the peace treaty negotiation in Season Unending, you will learn that names of all dragons are actually Words of Power, and that Dragon Shouts can be used to call them. You will then receive the Words of Power for Odahviing, in order to lure him into the trap as negotiated with the Jarl of Whiterun. If you did not negotiate a treaty, these words can be learned from Paarthurnax at the Throat of the World or Esbern at Sky Haven Temple.
You can now spring the trap for Odahviing. Travel to Dragonsreach and confirm with the Jarl that you are ready. Exit through the doors behind the throne room, to the “Great Porch” (Esbern calls it, incorrectly, the “Courtyard”). From this large open area you can call Odahviing, using first his Dragon Shout, and then Dragonrend to draw him out of the sky. (Note: You may need to go up on the small balcony to the right and shout from there. When shouting, hold the button down for longer to complete the Call Dragon Shout.) Do not bother fighting him or trying to drain his power, as he is at this point invincible. Lure him into the enclosed area, and the trap will come down on his neck and hold him in place. He will then speak to the Dragonborn, and offer to take them to Skuldafn in exchange for his freedom.
Note: If your followers or NPCs insist on tanking Odahviing and keeping far away from the trap, attack him until he is “KO’d” and then retreat to the doors. When Odahviing’s HP is restored (since he is not killable at this point), he should attempt to follow you and get trapped.
At this point, Farengar may come in and start running tests on Odahviing, with amusing results. When you choose to free Odahviing, a guard on the second floor will help you. Speak with Odahviing again, and he’ll carry you to Alduin’s portal to Sovngarde via a cutscene.
Bugs
If you have started Paarthurnaax before completing this quest. It is possible that you cannot kill Odhaviing, and he seems invincible, Solution: Kill Paarthurnax before fighting Odhaviing,
When you release the captured dragon, he will attack you and you cannot talk to him. Walk out the door and wait for 1 hour and walk back in. All of the NPC’s should be calmed down and you should be able to talk to him.
PC Dragonrend doesn’t activate the encounter with the dragon and instead circles above. Hitting the dragon while he passes extremely close usually triggers the event. Re-loading the quest, from moment before entering the hall, also helps. OR Another way to fix this problem is to exit Dragonsreach, then wait for 20 hours and reenter.
If you’re experiencing bugs listed below, typing “setstage mq301 200” into the console when Odahviing is trapped will remove his hostility and let you talk to him.
If Odahviing doesn’t speak to you once he’s been trapped, it’s because the Jarl wasn’t at the Porch before you called the dragon. If Vignar Grey-Mane becomes Jarl as a result of the Stormcloak questline, then he’s likely sitting in Jorrvaskr 24/7. You must do the first Companions mission (Take Up Arms) before Vignar will leave the building. Once you get back to the Porch, Vignar should be waiting for you and the mission can proceed.
If Odahviing doesn’t speak to you once he’s been trapped and you have completed the first Companions mission, simple reload the autosave and recapture Odahviing, he should now offer to talk.
Odahviing will run after you but will randomly stop halfway and cease to move and attack like there is an invisible wall where he can’t move, attack, speak or etc.
If you attempt to save the first attacked guard by force shouting him back into the relatively safe trap area, Odahviing will swoop through the stone walls, the guard will be lifted and appear to be moonwalking. If he’s close enough to the second floor walkway, you can inspect his corpse like regular, although he will still appear to be moonwalking in midair.
If Farengar is killed before Odahviing is captured, conversations will still continue between the Jarl, Odahviing, and Irileth as if he is performing tests on the dragon.
If you fast travel from Dragonsreach before the dragon walks onto the porch, he may disappear from the game entirely with the game prompting you to go out the dungeon, but there will not be a dragon in sight. Similarly, if you walk through the door and back out too early, he may be stuck half way in the ground. You can still talk to him as normal. Did not test flying.
360 PC There is a bug where the Jarl of Whiterun doesn’t return to Dragonsreach, instead standing outside and the bottom of the stairs. You cannot tell him that you are ready for the trap to be set. Whenever you talk to him, he says, “I’ll have my men ready as soon as I return to Whiterun”. This can be fixed by replaying from a previous save. On the PC, this can be fixed with the console command moveto player after selecting the current Jarl.
360 If the Frostbreath Shout is used on him while he’s flying, he may fall to ground below the porch. This is an instanced area he will fall outside of the map and the quest will be uncompletable.
When using a sneak attack that “one hits” elder dragons on him, it may bypass his health completely killing him and making the quest uncompletable.
When calling him after the quest, he has the option to be talked to, yet no dialogue will appear.
360 If the Dovahkiin runs back to the edge of the balcony as the trap falls, Odahviing may appear to trapped with his tail where his head would be. Fire will still shoot out when the mage tries his expirements and dialogue will still occur as if you were talking to his face. This is fixed after Odahviing is released.
If you use the wrong shout, your shout will not regenerate. Just reload your last save point and you should be fine.
During the battle with Odahviing, he may land on top of the roof and remain there without attacking. He won’t move at all and nothing happens when his health is brought to zero.
PS3 Once you have Odahviing captured, if you make the guard you are supposed to talk to free Odahviing hostile, then make him go outside, you can attack him and make him fall to one knee. Then when you get arrested, once you leave jail or pay the fine, the guard will vanish and the quest marker will point to the Whiterun dungeon, but he is not there. Also, at this point there is a chance that when you release your follower, he/she will be hostile and try to kill you.
PS3 The guard you need to speak to about freeing Odahviing can be killed when Odahviing attacks after being called. This can simply be ignored by pulling the lever next to him.
If you have a bounty in Whiterun and you have bribed a guard to ignore it, when you try to set Odahviing free by talking to the guard, the guard will only say ‘Wait, I know you’ rendering the quest uncompletable. This can simply be ignored by pulling the lever next to him.
Occasionally, Odahviing will not take any damage from either the Dragonborn, any followers, or even any Guards that assist in the fight. This can be fixed by simply leading Odahviing into the castle which activates the trap thus continuing the quest.
There is a bug when you go to the trap, and when you use the “Call Dragon” shout Odahviing will not show up.
Sometimes, for the objective “Prepare trap for Odahviing”, the quest marker may lead the Dragonborn directly to the Great Porch instead of to the Jarl. The quest cannot progress without first speaking to the Jarl. To fix this, simply wait any amount of time and the Jarl should appear in Dragonsreach and the quest marker will redirect to him.
Trivia
If a Whiterun Guard is killed and thrown off the building you can still loot his/her body, by going to his/her last position.
You might need to hold down the shout button then release in order to cause Odahviing to come and complete the “Call Odahviing to Dragonsreach” section of the quest.
After completing the Peace Treaty with both sides, the Civil War questline is halted until the main quest has been fully completed. Season Unending is automatically skipped if the Civil War questline has been completed.
Objectives
Talk to Arngeir
Talk to General Tullius
Talk to Ulfric Stormcloak
Talk to Arngeir
Take your seat
Negotiate a truce
Walkthrough
The Dragonborn must talk to either Paarthurnax, Arngeir, or Esbern. Whomever is picked will say that Dragonsreach was originally designed to capture and house a dragon.
Jarl of Whiterun
The Dragonborn tries to enlist the Jarl of Whiterun’s help, however the Jarl will say that he cannot try to capture a dragon while Whiterun is under threat of attack. He says if a peace treaty can be agreed between the Imperials and the Stormcloaks he will help capture and hold a dragon. The Jarl will also suggest talking to the Greybeards, as both General Tullius and Ulfric Stormcloak highly respect them.
Note that if the Dragonborn has completed the Imperial Legion or Stormcloaks questline except the final battle for (capture Solitude or Windhelm), or completed the questline entirely, the Jarl will agree to capture a dragon without talking to the Greybeards.
Peace treaty
Speak to the Greybeards and they will agree to help negotiate a truce. Arngeir will suggest the Dragonborn speak to both General Tullius and Ulfric Stormcloak, and extend an invitation to meet with the Greybeards and discuss the future of Skyrim.
Once the peace conference has started, the Dragonborn is given many options, mostly having to do with the side taken in Civil War questline.
Negotiation 1: Elenwen
As soon as the negotiations begin, Ulfric raises objections about Elenwen even being involved in this council. Tullius or Ulfric will ask what the Dragonborn’s thoughts are:
To agree with Tullius and keep Elenwen in the meeting.
To agree with Ulfric and eject Elenwen from the meeting.
Negotiation 2: Markarth or Riften
The next item to discuss is giving up a major Hold.
If sided with the Stormcloaks, General Tullius will demand that Riften be turned over to the Empire. Otherwise, Ulfric will demand Markarth surrendered to the Stormcloaks. The opposing faction’s reaction depends on the state of the Civil War: The faction that controls Markarth or Riften asks the Dragonborn what they believe is a fair trade for the city.
The answer is always one of three choices:
An exchange of a major Hold the opposition has.
An exchange of a minor Hold the opposition has.
Alternative dealing with choice in Civil War questline.
The council goes along with whatever choice is made. The side that controls Markarth or Riften will be unhappy if it is bargained for a minor Hold.
Negotiation 3/NA (Through Console Command): Falkreath or ???
If Console Command is used to do the mission when The Stormcloaks or the Imperials only have their capital left, the other side will down size their demand to a minor hold. Here the Dragonborn has the choice of giving up Falkreath to the Imperials or the Stormcloaks. There is no difference in Speech other than at the end if Falkreath is given up, Tullius tells the Dragonborn of his displeasure. He does not use that speech if Falkreath is kept. The Stormcloaks will take the deal either way.
Negotiation 4: Concessions
It is now time for the faction that has been favored less (and thus “losing” the negotiations) to ask for additional concessions. For each demand, the Dragonborn can choose whether to agree to the concession.
This continues until the side demanding a concession runs out of concessions to ask for (which requires one to refuse all their demands).
Conclusion
Once the treaty is agreed, the quest is complete.
If the Dragonborn has sided with the Stormcloaks and has liberated Falkreath in the quest line Liberation of Skyrim, in which the next objective is to Liberate the Reach, then it is possible that after completing Season Unending the “Liberate the Reach” objective will also be complete. Note that the Liberation Quest line cannot be completed, if the Dragonborn has a bounty in Windhelm or Solitude.
If the Dragonborn has sided with the Legion and decides to trade the Reach for the Rift, then the quest Compelling Tribute (Imperials) in the Civil War line is skipped.
Notes
Whether Paarthurnax has been killed or not will affect the dialogue between Delphine, Esbern and Arngeir during the Blades request to attend the negotiations.
Trivia
Season Unending is the Ancient Nordic term for war. This is revealed through dialogue with Arngeir, which further reflects his opposition to war and his pessimism about the usefulness of the peace treaty.
Bugs
This section contains bugs related to Season Unending. Before adding a bug to this list, consider the following:
Confirm all bugs with other editors on the talk page before adding them below.
Always try reloading an old save first, before asking for assistance.
Don’t discuss possible bug fixes or origins. Leave those and all other first-person-anecdotes on the talk page, not the article.
Always add 360 , PS3 , and PC to clarify which system the bug appears on.
If the Dragonborn has started the quest to join either the Stormcloaks or the Imperials, it will be impossible to continue with the quest because there will be no dialogue box when he talks to the faction leaders making it impossible to tell them about the Greybeards’ peace treaty. This can be fixed by repeatedly tapping the activate button when speaking to Galmar or Ulfric. They will keep saying that a mission is ongoing. Upon completing the Battle for Whiterun, the option to talk to General Tullius and Ulfric Stormcloak becomes available again. It also is possible to talk to them when returning the Jagged Crown.
Workaround for not being able to talk to Ulfric: use console command “SetStage MQ302 30” after having already talked to General Tullius.
Workaround for not being able to talk to General Tullius: use console command “SetStage MQ302 5” after having already talked to Ulfric.
For those on consoles, joining either of the factions and speaking to the leader immediately afterwards (only works with General Tullius, Ulfric will just direct you to talk to Galmar)
Sometimes one or more of the original guards of the holds that were exchanged will still be inside the main city and the guard(s) will attack their new occupants.
PC 360 PS3 If the negotiators stop talking and the Dragonborn is unable to talk, they should exit their seat or it will be impossible to continue the creation of the treaty. PC players may use “setstage mq302 300” after the NPC’s are seated at the table to complete the quest. Talking to Esbern should continue the quest after that. For the Xbox 360 and PS3 use a previous save that has the older state of Season Unending to reload and finish the quest.
If the meeting does not start after the Dragonborn has taken a seat, staying seated and waiting 24 hours will trigger the meeting. If it still does not trigger, all guests should sit down after five to ten minutes of real time. Or leave High Hrothgar and then come back.
360 Another method for fixing the glitch where the meeting does not start after the Dragonborn has taken a seat: make sure that both the Season Unending and The Fallen quests are selected, then talk to Arngeir at the other side of the table. Finally, walk over and take a seat and wait for an hour once seated. This should trigger the meeting.
PS3 The Achievement/Trophy from the Civil War Quests can be missed because of how Season Unending plays out. If the favored faction gains one or both of the needed forts, the Dragonborn will not get credit, thus never unlocking the Achievement/Trophy. To fix this, ensure the opposing faction gets both Forts, or complete that portion of the Civil War Quests before starting Season Unending.
PC If Esbern is not talking, he should be disabled then enabled, by opening the console, clicking on him, then typing “disable” and “enable”, repeating every time Esbern stops walking around his seat. This might need to be done several times, after each dialogue of the present persons. Sometimes the console command “setstage mq302 300” will not work.
Sometimes the Jarl of Whiterun does not require this quest and will allow the Dragonborn to trap a dragon even if the war is not yet finished, when all Stormcloak cities but Windhelm or all Imperial cities but Solitude had been captured.
360 PS3 Legate Rikke attacks the Dragonborn if they have committed several crimes such as stealing horses at Imperial camps. This can be solved by attacking her far away from the negotiation room until she’s on her knees (marked as essential) and quickly sprint to the room to start the negotiations. The trick is not to let anyone else see Legate Rikke attack as they all will react quite shocked to the violence.
If The Forsworn Conspiracy hasn’t been completed, it will be automatically completed if Markarth is surrendered to the Stormcloaks. However, the next quest, Escape From Cidhna Mine, will not appear in the Quests screen.
Sometimes, Season Unending will not complete gracefully, causing quest stages for both it and the overall civil war quest (id “CW”) to not engage properly. For example:
Characters from the conference may endlessly walk up and down the stairs just outside High Hrothgar, not responding to the Dragonborn and not participating in any quest dialogue or events. If using the console they are killed, forcibly returned to their home locations, or recycled, they will simply walk back to the stairs and continue their endless loop (even walking across all of Skyrim to reach the steps). This can be solved by ensuring all finishing quest stages have been properly completed, specifically stages past 300. PC Check their status with “player.sqs MQ302” and activate stages with “setstage MQ302 <stage>”. As soon as the appropriate stage is triggered, all remaining characters will begin a long walk back to their home locations and will immediately be able to interact with the Dragonborn again.
Season Unending triggers stage 255 of the overall civil war quest (“CW”), a stage which is specially designed to stop the war while the peace conference is in session. When active, this stage puts a forced hold on all civil war combat quests (except for the Battle for Whiterun), preventing the selection of key dialogue options to trigger them. Stage 256 of CW releases this hold thus re-enabling the war, and should be automatically triggered when Season Unending completes. However, if the quest does not complete gracefully, the civil war may become stuck on permanent hold. PC This can be checked via “player.sqs CW” and fixed via “setstage CW 256”.
Alduin’s Bane is a quest available in The Elder Scrolls V: Skyrim. Upon retrieving the Elder Scroll, the Dragonborn will need to go to the Time Wound at the summit of the Throat of the World and learn from those who created it in the past the Dragonrend shout that can finally defeat Alduin once and for all.
Alduin’s Bane
Quest Giver
Paarthurnax
Location
Throat of the World
Prerequisite
Elder Knowledge
Next Quest
Season Unending
Reward
Dragonrend (Shout)
Type
Main Quest
QuestID
MQ206
Walkthrough
Upon completing the quest Elder Knowledge, you collect an Elder Scroll. You will need to return to Paarthurnax atop the Throat of the World and read the scroll at the time wound. When equipped, a cinematic scene will begin. You will see an image of past heroes. You will then learn all three words of the Dragonrend shout, which will be used to defeat Alduin. Once you come out of the vision, Alduin will attack you. Use Dragonrend on Alduin to make him land on ground, where you can then begin to damage him. After Alduin is defeated, he will fly off and escape.
Scenarios
Depending on difficulty, Alduin has roughly 100 – 250% resistance to both frost and fire magic and only shock damage will harm Alduin.
If you have completed the Quest for the College at Winterhold and retrieved the Staff of Magnus bring it with you to the Throat of the World with enough Soul Gems to recharge it fully. It will take two full charges while attacking Alduin from behind but since the staff drains Magicka immediately, then it drains Health, once the Magicka is depleted it will make swift work defeating him.
It is possible to trap both Paarthurnax and Alduin on the ground when they are attacking each other. If this can be done, stand behind Paarthurnax and use him as a shield and pick away at Alduin’s health. Use Dragonrend whenever you can and the two will become stuck on the ground fighting each-other instead of the character.
Like all dragons, Alduin’s breath attack relies on his magicka pool. A barrage of lightning type spells can potentially deplete his reserves to a point where he is helpless on the ground able to only do physical attacks.
During the fight between the Nord Heroes and Alduin, Alduin might get pushed toward the Word Wall when he steps over the corpse of the dead Dragon nearby. This causes Alduin to be stuck facing the Wall and trying to turn around. However this does not affect the game much, and Alduin will still be banished as usual.
You can stop Alduin from shouting the meteor storm by using Dragonrend as soon as you see him then conjuring a Storm Atronach; this can prove useful for lower-level players.
A good trick for low-level players is to always stand behind Alduin. He will always perform his tail bash attack, which is much less damaging than his bite or breath attacks.
The Shout Marked for Death is the best shout to use for low level players and it’s advised to get all three first as in only getting one or two of the whole shout might not take full effect until forcing him to land again by using Dragonrend.
Summon something (e.g. Dremora, Atronach, Spectral Assassin) to distract Alduin whilst you attack him from the rear.
Shadowmere also distracts Alduin during the battle allowing time to heal etc. Tip:Grand Healing will heal all allies.
Adventurers may also Summon Durnehviir at this point to witness a three way dragon battle(warning:this will leave you unable to use Dragonrend for some time).
For a faster way for Alduin use the Dragonbane and attack him on the back and keep on using Dragonrend for him to stay on the ground.
Bugs
PC 360 PS3 After viewing the cutscene and engaging in battle with Alduin, it is possible that if you use ‘Dragonrend’ before he has finished talking Alduin will not take any damage whatsoever and/or to become stuck. Also applies when a follower atacks Alduin before the conversation ends (verified with Serana).
Wait until Paarthurnax tells you to use ‘Dragonrend’ before you use it.
A known method of fixing this is by reloading an earlier save from before using the Elder Scroll in the Time wound. Also, leaving the location and fast traveling back to it fixes this. And if you die as defeating Alduin it is possible that you have to repeat this.
Another method is to travel to High Hrothgar, enter and exit the building, and run back up to the mountain to resume the fight.
Don’t open any menus until Paarthurnuax says “use dragonrend if you know it!”
PC 360 PS3 The music for the cutscene does not seem to play and there is no way to fix it
360 During the vision Hakon may slide under Alduin and make both of them fight on Felldir’s left.
360 Sometimes when attempting to kill Alduin, all attacks (Fire and tail/wing) will kill you instantly no matter what your armor or skills. This will continue until you turn off your console and reload the previous save.
360 The cutscene can freeze, causing you to be stuck staring at the 3 tongues, only pause works causing you to reload
360 When you begin the fight with Alduin, for some reason there will be no combat music. To correct this, simply reload the autosave made immediately after the cutscene.
PS3 When the player casts the Dragonrend on Paarthurnax, while he is fire breathing on Alduin, it is possible that the sound of Fire Breathing will remain forever. This can be fixed by fast traveling back.
PS3 Felldir may be killed by Alduin in the cutscene in the past before he opens the Elder Scroll, causing the player to be stuck watching an endless battle between the sword hero and Alduin where they keep hitting each other but do no damage. The flashback never ends and the player must go back to a savegame prior to opening the scroll and try again.
PC Use console command <setstage MQ206 32> to go on with cutscene.
PC 360 PS3 The Elder Scroll can be permanently stuck to the inventory after being used, adding 20 points of weight. This is because it is probably still needed by Septimus Sigmus’
Note: You can return to Urag and offer to give him the Elder Scroll, which removes it from your inventory and nets you 2000 gold.
Note: If you keep the Elder Scroll in your inventory, you can later return to the Throat Of The World, the air will ripple as if you are about to go into the flashback, and if you read the Elder Scroll it will act as if you are about to enter into the flashback, but you will remain on Throat Of The World.
PC PS3 It’s possible that Alduin won’t appear after Gormlaith Golden-Hilt’s warning. This causes the three Nord heroes stuck looking at the sky.
To fix this bug, first open the console and type: setstage mq206 70
This will teach you the Dragonrend shout, which is needed to defeat Alduin
Then, to get out of the cinematic type: setstage mq206 100
Alternatively, fast travel to another location and attempt to read the scroll. After this wait for 24 hours and the quest should work as intended.
PC Killing Alduin too fast may glitch the quest and leave you unable to complete it. Waiting until he summons fireballs from the sky usually solves the problem.
If you have Shadowmere with you (the horse you get from the Dark Brotherhood quest line), while he is grounded he will only attack the horse. So keep using Dragonrend on him and pick at his health with a bow from a distance.
360 When Hakon One-Eye is using his power attacks with his Ancient Nord Battleaxe, he seems to hold two weapons instead of one; the left hand has no visible weapon though.
PS3 During the fight with Alduin, Paarthurnax may become an “enemy”. You will not be able to end the battle without killing Paarthurnax. This affects future quests as the quest marker sits on the bones of Paarthurnax (Though Esbern may provide the information required to complete the next quest.) The Blades will not give you the Paarthurnax quest and Arngeir will not recognize that Paarthurnax has been slain. Does not appear to be a fix for this – merely restart from previous save.
PC During Alduin’s Bane, when Alduin eat Gormlaith Golden-Hilt, Alduin can hit and instantly killing Felldir the Old by accident leads to Unfinished quest.
PC During the cutscene, after the three nord heroes used Dragonrend to cripple Alduin, he may become invulnerable, causing the three heroes to keep hitting him and the event in which Gormlaith is killed never happens, resulting in an endless battle.
To get out of this cutscene and finish the quest, open the console and type: setstage mq206 100
Note: Upon exiting the cutscene, an additional Alduin may appear standing on the ground, in addition to the actual Alduin that needs to be defeated. He is invulnerable. After defeating the actual Alduin, fast travel to any other place, and if you return to the Throat of the World, the bugged Alduin will be gone.
360 Repeated use of poison against Alduin may cause the game to freeze. Loading from a save made after the use of poison can also cause the game to freeze.
PC A rare bug makes the player completely invisible. Can be fixed by reloading the last save.
It is possible that Alduin will take no damage no matter what.
This is caused by attacking Alduin before the talking is over.
On Xbox 360 to fix this bug simply exit the game and go to console settings/memory. Once there press y and reset your system cache. Be warned that you may have to do this several times because you can cause it to glitch again the same way.
Another way to fix this is to run away from the fight and to come back after a few in-game days. Alduin will take damage as normal.
Trivia
The cinematic part in this quest when you read the Elder Scroll at the Throat of the World is the only visual representation of the Dragon War, besides the books that can be read in the game.


")
")
")
")
")

")
")
")