Learn flame atronach Guides in The Elder Scrolls Online

Peek behind the scenes and learn how we bring Tamriel to life in The Elder Scrolls Online.

If you’re familiar with The Elder Scrolls, chances are you’ve encountered atronachs of several varieties during your travels—maybe you’ve even summoned some of these powerful Daedra yourself. Do you enjoy the challenge of going head-to-head with these dangerous foes and those who command them? Then you won’t be disappointed; you’ll see plenty of atronachs as you explore Tamriel in ESO. Let’s take a closer look at what you can expect from ESO’s flame atronach.

The flame atronach in Skyrim had a fluidity and otherworldly grace that we wanted to exaggerate for ESO. It floats off the ground, wreathed in fire as it spins and twirls with ease. Our Effects Artists created an intricate effect of flickering flames that dance across the atronach’s body. For all our creatures, we focus on creating believable effects that fit with the creature and look right in the world.

Comfortable both in melee and at range, the flame atronach can lob deadly balls of fire, and it radiates a continuous burning aura, making it quite dangerous at any distance. Unwary adventurers may also find themselves scorched by the Daedra’s most impressive attack, a geyser of flames that erupts from the ground. The flame atronach can even be deadly once defeated, when it explodes in a last-ditch effort to destroy attackers.

Sound effects are critical for any creature—especially for one with so many kinds of movements and attacks. Most of us are familiar with the kinds of sounds fire can make, but how do we create believable audio for a creature of animate, magical flame? Our Sound Designers get a good look at creatures and their animations before they get to work to get an idea of the kinds of sounds they’ll need to create. For the flame atronach, they imagined how its various attacks would sound right away. Utilizing huge sound libraries, they found sounds for swinging torches, campfires, and even an actual geyser.

When they found the sounds they wanted to work from, the Sound Designers got to work combining and adjusting sounds, adding effects, and using videos of the flame atronach to time the sounds just right. They’ve described the process as almost an “audio collage,” piecing together new sounds that fit on a twirling, fiery Daedra by altering recognizable ones. Once the process is complete, our Sound Designers have created believable sounds for a creature that isn’t real at all.

When you’re out exploring, keep your ears open for crackling flames—it may save you! Check out the video below to get a look at the flame atronach in action. We hope you enjoyed this Creating ESO. There’s still plenty behind-the-scenes info we want to share, so make sure to check back for our next edition!

Source from:http://www.elderscrollsonline.com/en/news/post/2013/08/19/creating-eso-flame-atronach?ref=news-list

Arm yourself when you play The Elder Scrolls Online

Arm yourself! You’ll be able to craft every item in this image when you play The Elder Scrolls Online.

Smiths in Tamriel add their own personal touches to every weapon, shield, and piece of armor they forge, from choosing a racial style to imparting special bonuses they’ve learned called traits. Master blacksmiths, clothiers, and woodworkers can take ordinary arms and armor and, with the right materials, transform them into equipment worthy of a true hero. In this image, you can see a small sample of the kinds of weapons and armor you’ll be able to craft in ESO if you choose to pursue the fine art of smithing. Represented here are items crafted in each of the nine racial styles, but these are just a few of the items you can create—there are already fifteen different styles for crafters to learn!

Source from:http://www.elderscrollsonline.com/en/news/post/2014/03/05/crafted-weapons-and-shields?ref=news-list

The brutish ogrim Guides in The Elder Scrolls Online

The last thing many adventurers see is the fist of the brutish ogrim crashing down on them. Read on to learn more about this tough Daedra and how we brought it to life in The Elder Scrolls Online.

You probably remember the ogrim if you played The Elder Scrolls III: Morrowind. We’ve brought this Daedra, along with many others you’ll recognize, into the world of The Elder Scrolls Online.  We’d like to take you behind the scenes for a closer look at how creatures like the ogrim go from concept to ferocious in-game opponents.

When creating the ogrim, we first looked at the Morrowind model and existing lore fromThe Elder Scrolls games. This helped us get a feel for the creature and gave us a great starting place for bringing it into ESO. As with any art that goes into the game, the ogrim began life in the concept phase. Concept artists drew up several thumbnails—quick, small sketches—with lots of ideas for visual direction. Once the Art Team settled on a direction, more images were created: color studies and several different, more detailed concepts were developed to be used as reference by Figure Artists. Below, you can see some concept art for the ogrim.

After the concept stage was completed and the artists were happy with the results, Figure Artists began creating the ogrim model you’ll see in-game. Using the concept art to guide them and inform how it should look, they created the lower-resolution model first to get the basic shape and structure just right. This part of implementation is similar to a sketch—it’s the rough outline for the creature. After that, the details were filled out in the higher-resolution version; finer facial details, parts of the skin like spikes and bumps, and similar features were added. Then, to top it off, Texture Artists painted the model, adding color and the finishing touches to the creature. You can see the current in-game model for the ogrim below.

For the ogrim (and all of our other creatures and NPCs), it was important to make sure it fit in with the world. It didn’t just need to look good on its own; it needed to fit into the environment and look appropriate alongside player characters and other enemy creatures. The artists paid close attention to this throughout the process and always work to ensure that every piece of art works with the game’s overall style; consistent visuals help us create and maintain immersion.

Even though the ogrim model was complete, there was still plenty of work to be done. Animators “rigged” the creature, providing it with a skeleton and framework for animations. With that completed, we had all the groundwork needed to get it in the game. At this point, we were really able to develop the ogrim’s personality. An important part of any enemy’s personality is its look, but its behaviors, animations, sounds, and effects really bring it to life. Our Monster Team worked closely with Animators, Effects Artists, and Audio to make sure that you won’t forget an encounter with the ogrim in ESO!

Source from:http://www.elderscrollsonline.com/en/news/post/2013/04/09/creating-eso-the-ogrim?ref=news-list

New armors art in the Elder Scrolls Online

Check out this new art for a look at Orcish, Khajiit, and Argonian heavy armors.

Finding a shiny new piece of armor that offers more protection or a magical benefit is something every adventurer looks forward to. In ESO, not only will you find stronger and better armors as you explore, but you’ll find them in different racial styles, as well. Crafters can learn to create weapons and armor in the various racial styles, so you’ll be able to create or find a set of your favorite kind. Check out this new art, where we show off the Orcish, Khajiit, and Argonian heavy armors:

Source from:http://www.elderscrollsonline.com/en/news/post/2013/11/27/more-heavy-armor-styles?ref=news-list

Why to buy ESO Gold at eso-gold.com

Eso-gold.com continues to lead the market for over 8 years, NOW we start our business on buy ESO Gold with us now! Always keep huge stocks on ESO Gold all servers. Instant delivery Elder Scrolls Online Gold. Available 7/24 customer support for any and all questions. Smooth and secure transactions, guarantee delivery safe on our site.

ESO-Gold

Instant Delivery
Eso-gold.com works hard to improve delivery speed in order to help you play your way faster.

Full Stock
We keep abundant stock on all ESO servers. Gold will be delivered quickly and safely to your account.

Buy ESO Gold

Money Refund
We guarantee every order is delivered as soon as possible and we assure your money back.

Lowest Price
Eso-gold.com never give up trying to offer lower price for our loyal customers with 24*7 no break service.

ESO Power leveling

Account Safety
Eso-gold.com guarantee all ESO gold, accounts and items we sell are legal and will not do harm to your account to make sure 100% safety.

Starting out in The Elder Scrolls Online: Coldharbour and Stros M’Kai

ESO

When we were planning assignments for The Elder Scrolls Online’s embargo lift, I volunteered to go through and document each of the factional starting zones. This was a great plan, except for technical difficulties. I was able to play fine for the first few hours at high settings, but coming back to continue where I left off led to a series of frequent GPU crashes, even at lower settings. Fortunately, I was eventually able to make it work well enough get one zone done, and Matt stepped up to cover the other two.

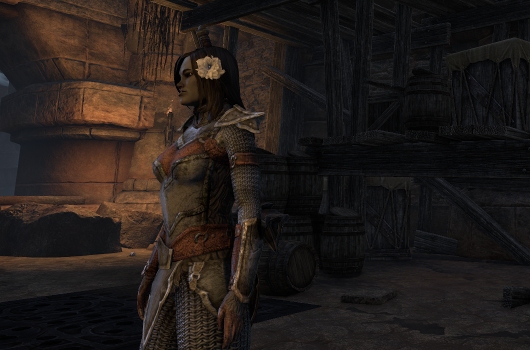
So today I’m going to cover the shared introductory experience, followed by the first island zone you end up on as a member of the Daggerfall Covenant. That’s the faction based in the north-west of Tamriel, consisting of the magically inclined mountain kingdoms of the Bretons, the dark-skinned Redguard and their desert homeland, and the roving clans of Orsimer, better known as Orcs. I actually made a character of each faction but settled first on the very pretty Orc lass with a flower in her hair over the chubby, antlered Wood Elf and ostentatious Argonian lizard featured in the other factions. Spoilers ahead!

This place sucks. Let’s go somewhere else

Although there are three factions, each with its own questing zones, every character has a nearly identical introduction to the game. It kicks off with a cutscene in traditional Elder Scrolls fashion; you’re a prisoner being carted off to execution, at least according to placeholder text. The cutscene has yet to be implemented, so I can’t speak to any specific qualities of it. Where this one departs from tradition is that you actually are executed as part of a sacrifice to a Daedric Prince (that’s basically a demon god, for those who don’t speak in Tamrielian tongues) to help fuel the summoning of an Anchor (that is like a Rift from RIFT if they all connected to the Plane of Death), and your metaphysical remnants are sent through.

It’s at this point that you awaken in a cell that serves as the character creation screen. The options are pretty solid and comprehensive, providing players with character models that are by far the least awful in the franchise yet. It’s just a shame the animations are so stiff and lifeless.

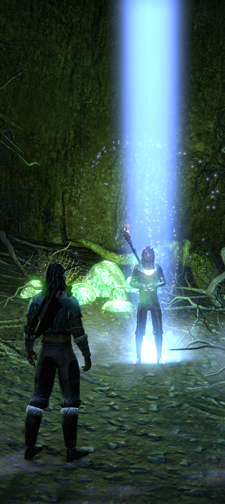
When you’ve finished, you’ll be greeted by Obi-Wan Medivh Dumbledore the Prophet, an older man in a cowl mystically projecting a translucent blue image of himself to inform you that you need to get out of there. Hardly a revelation. He does nothing to help you, as you are released from your cell by a random prisoner also making an escape, rather than just running for it.

After darting through some tunnels, you get to a collection of handy weapon racks just lying around in the open. You get to arm yourself as you please from any one rack, which cover the whole range of weapon skills. Any weapon type can be used by any character, so go nuts.

This is not the Anchor I went through but it probably looks exactly the same.

After a few more tunnels and a couple of pushover fights against skeletons, you’ll run into Fem Shep Lyris Titanborn, the Prophet’s bodyguard. You can opt to question her further for a little clarity on the situation. Emphasis on little. She does inform you that this place is called Coldharbour and that you’re now what’s known as a Soul Shriven, but she doesn’t clarify what either means in specific terms. Once you’re done chatting, Lyris will stick with you, helping you fight through yet more tunnels. She’s not terribly effective, but she’s far from a liability against any of the weakling foes you’ll encounter.

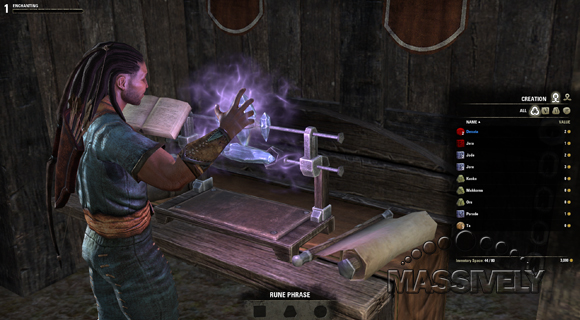
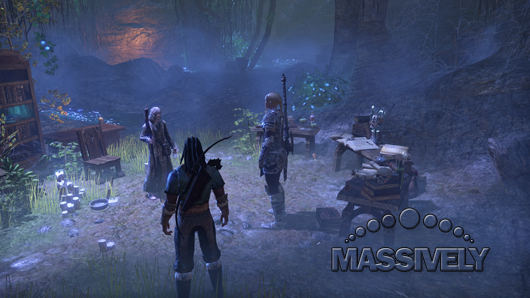
You’ll come out of the tunnels into a slightly open area. This is where you may start seeing other player characters, not just fleeing NPCs. This is also where the ransacking of every urn in sight begins. Seriously, there are urns, as well as occasional chests and crates, all over here and the following areas until you escape. It’s kind of boring to loot them all, but it’s worthwhile if you plan to take up the Provisioning craft. The vast majority of items you’ll get from these are ingredients for cooking and brewing, as well as Provisioning recipes, lock-picks, and cultural crafting materials. Those are used to define the appearance of gear you craft.

As you continue, you’ll encounter a quirky zombie voiced by John Cleese, who appears to be incredibly frail and unlikely to be important later. Great use of a famous voice there. Once you open up the special prison for the Prophet, Lyris will voluntarily swap places with him because the only way to get him out is for a living person to take his place. You’re not quite alive just yet.

The Prophet reveals that he no longer remembers his own name, at which point I knew he had to be the last Emperor or his heir. I have no other evidence for this, since I couldn’t get very far in the game, but that’s exactly the trope that fits.

You and the Prophet continue on, facing the obligatory taunt from a giant hologram of Molag Bal, the Daedric Prince who rules this place right before you get to the Anchor you need to use to make your escape. At the Anchor, the Prophet casually conjures a Skyshard and tells you to attune yourself to it so you can be a real boy regain physical form. These are pretty important, as you’ll find them lying around the world; for every three, you gain an extra skill point.

Pirates of the not doing anything piratical

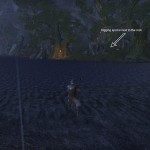
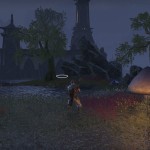
Assuming you’re playing a character in the Daggerfall Covenant, you’ll find yourself waking up below decks on a pirate ship. The Prophet will appear to you in his astral projection form, letting you know that you fell into the sea and were pulled out by the ship’s crew, while he landed somewhere else far off.

There are a few things to loot around here, but from this point on, urnfest is no more. Don’t worry, though, because the NPCs don’t care what you steal, even from right under their noses. It turns out the ship has suffered a recent mutiny, since the Captain, a Redguard with some loyalty to her people, refuses to raid any more Breton ships for the sake of the Daggerfall covenant.

Curiously, all three NPCs you’ll meet who consider themselves pirate captains, whether or not they currently have a crew or a ship, are women. This captain, Kaleen, offers you a proposal: Work with her to assemble a crew and pull a heist, and she’ll help you get off the island. She gives you the names of three people who could be a big help and lets you pick one.

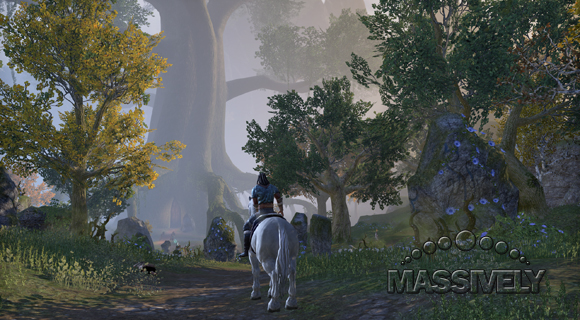
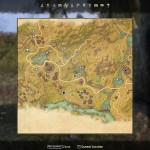
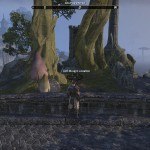
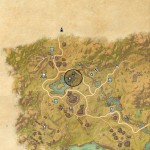
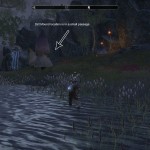
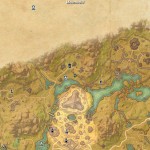
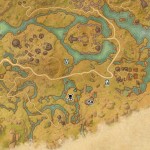
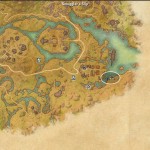
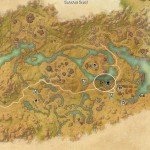
Of course, you can and probably should go find all three, but you need just one. Once you’ve made your choice, it’s time to go outside and start exploring. There’s actually very little directed content. If you choose to go through the main quest and ignore everything else, you could be off the island in an hour. Assuming you want to make the most of things, you should go explore everywhere. Most of the quests are found off the beaten path.

Sometimes people don't like each other and they start fighting I guess?

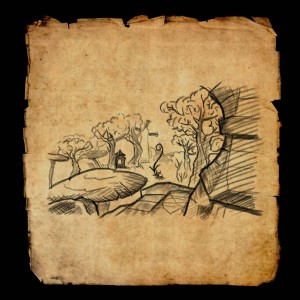
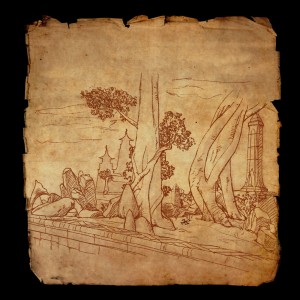
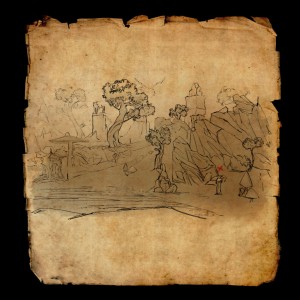
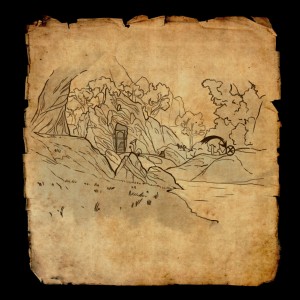
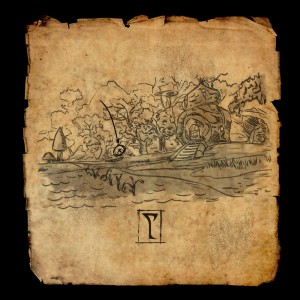
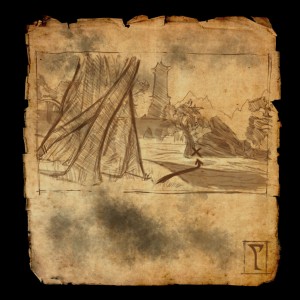
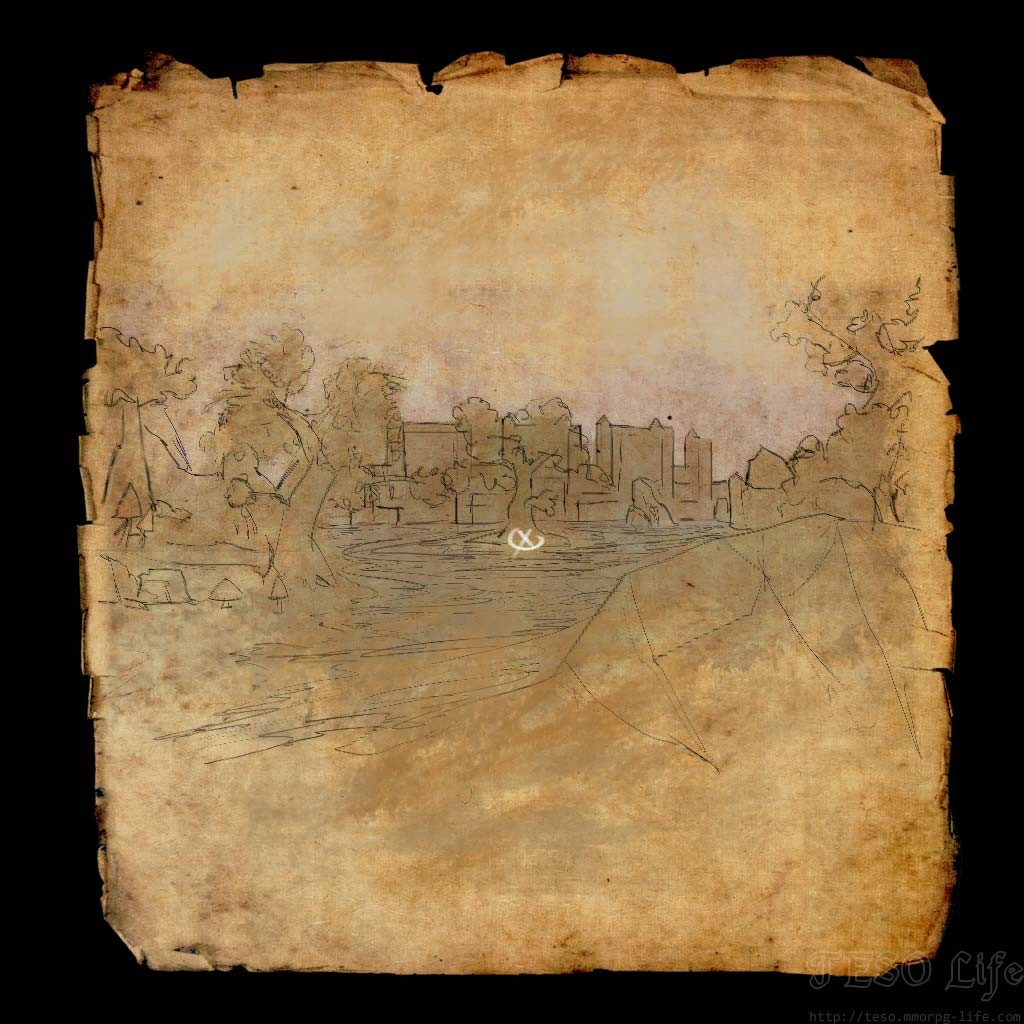
The side-quests are rarely interesting, although at least not a single one ordered the killing of generic enemies. You will have to do so in the course of quests, but only because they’re in your way. The only side-quest I found noteworthy was a treasure hunt, but it wasn’t gripping so much as mildly different.

The quests to recruit your three allies, much like the characters themselves, have the elements to make something interesting, but they come together in a rote, uninspired whole. Once you’ve recruited the one you asked for directions to, you can choose to go ahead with the heist. Each of the allies you’ve recruited can help you with the heist by taking care of one of the steps. I accepted the help of all three, so the whole thing was trivial, though I’m not sure it would have been much trouble without them. And at some point by now, the Prophet has probably randomly appeared to you to let you know that you can find him near Daggerfall. What a shame you can’t get to Daggerfall yet.

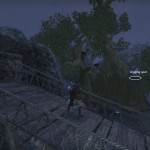
After the heist is over and you feel ready to move on, it’s time to set sail… for another island. This time it’s primarily inhabited by orcs refusing to join the Covenant. I’m fairly certain they’ll change their minds after you help them with their problems, of course, but I am done. I’m never getting to Daggerfall.

Source from:http://massively.joystiq.com/2014/02/07/starting-out-in-the-elder-scrolls-online-coldharbour-and-stros/

Five essential Elder Scrolls Online addons

Tamriel Infinium: Five essential Elder Scrolls Online addons

The Elder Scrolls series is known for its mods and addons, and Elder Scrolls Online is no exception. Although we will likely not see the appearance modifications found in MorrowindOblivion, and Skyrim, we will see UI addons that help with grouping, dungeon crawling, and even roleplaying. In fact, modding is so essential to the Elder Scrolls franchise that Curse announced it was opening its own site featuring Elder Scrolls Online addons, and ZAM launched its ESO addons website a few weeks ago.

I’ve been keeping an eye on these addons as they begin to take off. As you would expect, initially the pickings were slim. However, over the last few weeks with the beta weekends, the ongoing beta, and the NDA drop, we have seen these addons grow exponentially to the point that I think some of these modifications are required to properly enjoy the game.

Today, I will list some of the addons that I think are necessary before you even start playing the Elder Scrolls Online. Although modders Wykkyd and WarLegend lead the pack, there are plenty of lesser-known mods you might want to look at. Here are my top five mods for the Elder Scrolls Online.

Wykkyd's Outfitter
Wykkyd’s Outfitter

ESO does not have dual-spec or any kind of on-the-fly skill tree reset. But as you progress through the game, you will gain more skills and abilities than you will use in one instance. In fact, there might be opportunity for you to switch roles from one fight to the next. As I demonstrated in the last Tamriel Infinium, depending on the weapon and armor set, every class can play any role. Let’s say you happen to be one of those people who are good at multiple roles, and you want your Templar to heal during the first boss fight and tank during the second. Wykkyd’s Outfitter will not only allow you to quickly switch between different skill bar sets but change your armor for you to match the role you need at that moment. It is certainly the most impressive addon I’ve seen so far.

The downside, if you want to call it that, is that you have to add Wykkyd’s Framework in order for the outfitter to work.

WarLegend Raid Frame

Recently in my MMO career, I’ve gravitated toward DPS and tanking. And as a DPS or tank, I like my raid frames to be clean and crisp. WarLegend has thankfully helped me out. His frames are clean and to the point. There’s no doubt I will add these to my addon collection.

You might want to check out WarLegend’s HUD, too. ESO‘s stuck with the default, minimalistic HUD, but if you like more information at your fingertips, then you’ll probably want the upgraded HUD addon as well.

XP View

Sometimes the most necessary mods are also the simplest. Sometimes we don’t need the quick-change addons. Sometimes large group communication doesn’t make the quality of life better. Sometimes we just need to know how to improve what we are doing right at a certain moment.

NaburBR has created a simple yet elegant mod that simply tells you how much XP you’re gaining. If you’re power-leveling or looking to quickly jump to the next zone, you will want to know if you’re gaining experience efficiently. That is exactly what XP View does. It tracks XP per hour, time to level, and estimated kills to level. Even if you’re not a power-leveler, this is good information to have.

Wykkyd’s War Tools

I don’t know about you, but I can’t always be on voice chat when I do world PvP. Although I will likely never lead RvR battles, I do like to know where fights are concentrated and add as much as I can to a particular fight. Unfortunately, communication in the heat of battle can be horrible, but Wykkyd has created a solution to this issue.

Wykkyd’s War Tools allows for instant communication to the whole party. For instance, as a group leader, you can right click on a particular node to command the party to scout out that node. If that party is running Wykkyd’s Framework, then it will see the command appear in the middle of the screen — no voice necessary.

ZR Mini Map

Most of my friends categorize themselves as MMO players. Many don’t even play single-player games at all. This is likely because they just don’t have the time to commit to more than one game. Even when they are in a game, they don’t have time to mess around. They want to find the quest quickly and figure out the fastest way to complete it. And nearly every one of these friends asked, “Where’s the minimap?” when they first logged in to ESO. Of course, I’d have to explain that the newest Elder Scrolls games do not have a minimap. “Then how am I supposed to know where I’m going?” is the next logical question. Then I have to explain about the compass at the top. “That’s crap,” they say.

Well, crap no longer. Zerorez created a minimap for ESO. It’s simplistic at the moment, but it does appear on your screen without your having to hit the M key all the time. The addon shows points of interest, wayshrines, and of course, quest objectives. Zerorez says that its a bit buggy at this stage (for instance, filters do not apply unless the map is reloaded), but for anyone coming from the MMO world, this addon is a must.

Creative players have developed too many mods; I have so many more than five favorites. Tmpst’s RP Plus addon makes emoting easy, and Wykkyd’s Group Tools make forming parties much easier. I could keep going, but I want to know what you think. Take a look around the mods on Curse and ZAM; what stands out to you? Which ones are you going to load up when the game goes live?

Source from:http://massively.joystiq.com/2014/03/18/tamriel-infinium-five-essential-elder-scrolls-online-addons/

Outside the box healing and tanking in The Elder Scrolls Online

Tamriel Infinium: Outside the box healing and tanking in ESO

In last week’s Tamriel Infinium, I had my top-tier theorycrafter and friend Calls1gn throw together some off-the-wall DPS builds for The Elder Scrolls Online. But he could theorycraft all day, and it wouldn’t mean anything if he couldn’t put it into practice. Luckily, ZeniMax opened the doors to the ESO beta again this past weekend. I was totally intrigued by the melee Sorcerer with pets. After playing that type of character at low levels, I have to say that it’s an extremely lazy class. Now, I didn’t have all the abilities because they required a higher-level character, but even at my low level, I mostly sat back and watched my pets do their thing while I found one mob to beat on. It worked and was more than viable.

Of course, building a DPS class is easy, right? What about something that requires a bit more concentration? What about a tank or a healer? Building a DPS character is a bit less difficult than tanks or healers, but that doesn’t make them any less difficult to play. Still, your playstyle does change, and your focus changes if you want to tank or heal.

I asked Calls1gn to build us a few tank and healer classes, too. I wanted a Dragonknight healer because there are few DK abilities that have anything to do with healing, and I wanted a Sorc tank because — well, just because. He delivered.

Unconventional healing
Admittedly, the Dragonknight skill trees contain zero healing abilities. In fact, the class abilities don’t even augment healing abilities. I had honestly thought I’d given Calls1gn an impossible task. For instance, If you look at the Ardent Flame tree, you can see the AoE DoTs and the CCs, but none of those abilities appears to perform any action that will help out a healer. Draconic Power clearly helps a player tank, but with only one healing ability, it’s not a tree worth climbing, especially since that healing ability heals only the player himself. Calls1gn picked the Earthen Heart tree because of its group utility.

Healing with heart

The three major healing abilities come from your restoration staff in this build, of course. Light armor and racials can help augment your magicka pool, and the secondary abilities will increase your overall protections. Although healing is your primary function with this build, you will also want to offer as much protection to your allies as possible.

Igneous Shield and Magma Shell (coupled with Protective Shell synergy) grant armor protection to your allies. If you use this build, make sure these are activated as often as possible since they will ultimately make your other work easier. Set up Combat Prayer as your spam heal. Not only will this heal everyone in front of you for a moderate amount, but it will also increase armor and spell resistance for all those affected by your heal. Then, if you need concentrated healing, you can turn to your Healing Springs or Mutagen. Bear in mind that none of these abilities will restore an ally completely from zero, so the idea is to keep everyone topped off. And with the amount of AoE healing and shielding, keeping your group up should be no issue.

Unconventional tanking
I’m not going to spend too much time on this, but I do believe that you should see what a typical tank will look like in ESO. Of course, the primary job is to grab aggro and absorb damage. However, the tank should employ a good amount of crowd control or group protection, too. This actually reminds me a bit of the original trinity from EverQuest of tanking, healing, and crowd control.

Traditional Templar tank

Calls1gn has obviously worked on this one for while. In fact, he didn’t tell me so, but I believe this will be his main build. Inner Beast (from the Undaunted tree) is designed to grab aggro with Channeled Focus and Defensive Stance building defensive prowess. Radiant Ward and Empowering Sweep damages enemies, hopefully grabbing aggro, and it also shields the Templar as well. The last ability, Radiant Aura, not only increases the Templar’s health regen but works as a group heal, too.

Now, let’s move on to something a bit less traditional.

Sorcerer mobile tank

This Sorc tank uses mostly light armor. In fact, he has to because his primary shielding comes from the light armor ability Dampen Magic, which creates a damage resistant bubble around the tank. He should likely use that ability as often as possible, along with Boundless Storm, which also increases armor. And like the Templar mentioned earlier, our Sorc tank uses the Inner Beast ability from the Undaunted tree. The other abilities, stemming from three different skill trees, are designed to slow down opponents or self-heal.

At first glance you might not think that this build cannot take damage, but it can. In fact, it should take only 50% of the overall damage, and with the self heal, it can actually stand still just absorbing damage. But what makes this build really great is its mobility. In fact, Boundless Storm increases movement speed as well as armor and spell resistance. And since the primary weapon is a destruction staff, this Sorc can tank from across the room, and if you happen to try this build, don’t be afraid to kite.

Weapon swapping
All of these builds stick to one weapon. That means at level 15, any player who uses these builds can actually switch roles just by by swapping weapons. If you wish, the melee Sorc from last week can instantly change to a tank by sheathing his two-handed weapon and drawing a destruction staff. The Templar tank can stow his sword and shield and pick up a restoration staff changing his role to healer.

My questions this week are obvious: After seeing this, do you believe it’s possible for any class to be viable in any role, and what crazy build are you going to try when the game goes live? See you in two weeks!

Source from:http://massively.joystiq.com/2014/03/04/tamriel-infinium-outside-the-box-healing-and-tanking-in-the-eld/

Massively’s Elder Scrolls Online launch diary: Day five – The (early) verdict

Elder Scrolls Online Harborage

Is it Friday already? Huh. This launch week has gone by fast, which I guess is a good sign for ZeniMaxsince time flies when you’re having fun.

My fifth day in Elder Scrolls Online was a bit more subdued than the previous four. I’m currently floating around Glenumbra between levels 12 and 13, waiting on my healer and tanker friends to catch up so that we can run Spindleclutch, also known as ESO’s first proper Daggerfall Covenant PvE dungeon. There are numerous public crypts available for exploration and pillage prior, but Spindleclutch is the first big-boy boss-based four-man.

But I didn’t feel like pugging it last night, so instead I started crafting.

Elder Scrolls Online tailoring

Tradeskills

For whatever reason I had been accumulating a ton of raw jute resources while adventuring throughout Glenumbra. I figured it only made sense to dispose of these and learn something about ESO’s Clothing skill line in the process.

First off, Clothing is one of six dedicated crafting skills. Like your class ability lines, your weapon and armor lines, and your guild and PvP lines, it levels up as you use it. There is no restriction on the number of crafting lines you can advance. There is, however, a maximum skill point cap, so if you specialize in Clothing, Blacksmithing, Enchanting, Alchemy, Provisioning, and Woodworking, you probably won’t have enough left over to kick ass on the battlefield.

ESO lightbeam that has nothing to do with crafting but was the right aspect ratio
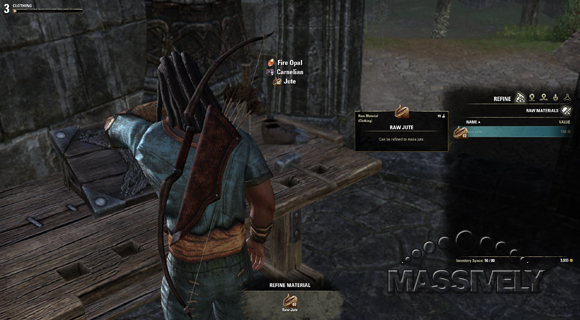
Harvesting does not have its own dedicated skill line. Anyone and everyone can harvest nodes in the wild, as all avatars come pre-equipped with the appropriate tools (aside from fishing bait, which you can loot from containers).

Thus far I’m finding the crafting UI and the mechanic itself to be both straightforward and fun. All you need do is collect the appropriate amount of raw materials and activate the appropriate crafting station. For this example, jute makes level 1 to 15 light armor, whereas rawhide, which I had also collected in abundance, makes 1 to 15 medium. Crafting stations are found in large cities and some smaller quest hubs, and ZeniMax has included that nifty little auto camera angle readjustment thing from Skyrimwhere you can see your avatar plying his trade after you activate the station.

Making a medium armor helmet for my level 10ish character was as easy as refining the raw jute (a single key press that handles the material in stacks of 10). Refining is the first tab along the top edge of your crafting menu, and it’s followed by creation, deconstruction, improvement, and research, all on their own tabs.

Moving over to the creation tab, you can arrow your way through all of your known recipes (some of which you start with and some of which you learn by finding/reading them while exploring). Just underneath that pane, there’s a material pane that allows you to add or subtract raw materials from whatever you’re crafting, which in my case boosted my helmet from a newbsauce item to a slightly less newbsauce level 10 item. The pane underneath that determines what racial style your finished armor piece will sport (you can purchase the required material addition from a nearby crafting vendor; in my case I had the starmetal necessary to get my preferred Redguard look).

You can also add a trait gem in the final pane if you’d like, but as I was fresh out of those, I went ahead with my vanilla medium armor helmet. Pressing R did the job, and voila! I equipped my spiffy new helm that blew the stat socks off the looted piece I’d been running with for a few levels.

I can’t speak for endgame yet, but at the early levels, ESO’s crafting is surprisingly deep for a themepark title. It’s also invaluable even though it’s optional. I made myself a full set of medium armor that greatly improved my survivability just by using the mats I’d been randomly collecting. There’s a lot more to ESO’scrafting minigame, too, as I haven’t even gotten into improvements and time-based research as of this writing.

Elder Scrolls Online enchanting

Customer service

Aside from crafting, I also had my first experience with ESO’s customer service apparatus. It’s been a mixed bag so far, with the positives being that ZeniMax actually responded to my ticket inside of 12 hours and the negatives being that two days later the CS has yet to resolve it.

I can’t ding ZeniMax too much for the latter because I’m sure that a launch-week MMO of ESO’s popularity is absolutely swamped with complaints. But it is somewhat vexing because the longer it takes for my situation to be handled, the longer I have to put off joining a guild and being social outside of my real-life friend circle.

As I mentioned in a previous entry, I had no idea that my account login name would be publicly visible when I made it. While several commenters have since pointed out that you can in fact set yourself as “offline” if you want to get away from your guildies for some solo play, one half of your authentication pair is still viewable to anyone in your social circle, whether you appear offline or not.

Since it’s unlikely that ZeniMax will admit its mistake here and stop handing out players’ personal information, I decided that I’d better petition to change my login name to something both more secure and less likely to broadcast my real-world identity to half of Tamriel.

Elder Scrolls Online wyrd tree

Final thoughts

Ultimately, I’m having much more fun in ESO than I expected. A couple of years ago I personally wrote the game off as yet another themepark made by yet another single-player game developer attempting to cash a big fat recurring revenue check courtesy of an IP with a massive built-in fanbase.

ESO is very much a themepark, but it’s one that places a premium on exploration and out-of-the-box progression. It’s also one that’s been built with a high level of craftsmanship, which makes it worth playing for a while. I still have some long-term questions, but right now I’m happy to be eating a bit of crow and exploring Tamriel’s latest iteration.

With all that said, it’s time to wrap up this launch week diary. Massively doesn’t do review scores, of course, because frankly how could we when it takes months if not years to competently review an MMORPG. In lieu of that, here’s a bullet point summary of my personal likes and dislikes from ESO’s 1 to 15 Daggerfall Covenant experience.

The good

  • Vast, immersive world design, varied topography
  • Flexible skill-based progression, large number of possible builds
  • Immersive UI
  • Fun (and useful) crafting
  • Lots of 1 – 15 PvE quest content
  • Access to large-scale PvP at level 10, siege weapons
  • Gameplay incentives/rewards for exploring
  • Lore, Elder Scrolls story, books, etc.
  • Franchise staples like lockpicking, container looting
  • Subscription model (yes, I still prefer one price for everything)

The bad

  • Forced public account login
  • Clunky combat/movement animations
  • Quickslot interface is awkward with a keyboard/mouse
  • Overcrowded public dungeons
  • Quest bugs

For our complete ESO launch week diary series, see the links below.

Source from:http://massively.joystiq.com/2014/04/04/massivelys-elder-scrolls-online-launch-diary-day-five-the-e/

Deshaan Treasure Map Locations Guide

Deshaan is a South-Eastern region of the Ebonheart Pact faction, suitable for players level 17-23. In this zone players can obtain six treasure maps and additional Deshaan CE Treasure Map, which is available as bonus only to those that pre-purchased the CE edition of the game. Don’t forger to take your map from the bank before starting the treasure hunt, or digging spot will not be visible to you without corresponding map in your inventory.

Deshaan Treasure Map I

Deshaan Treasure Map I

  • Western part of Deshaan, next to Muth Gnarr Hills Wayshrine
  • You’ll find the dig spot just a few steps west of Muth Gnarr Hills Wayshrine

Screenshot Walkthrough

Deshaan Treasure Map II

Deshaan Treasure Map II

  • Western part of Deshaan
  • From Obsidian Gorge Wayshrine head west towards the lake Hlaalu. When you arrive at the stone bridge, turn left,a nd you will spot dirt mound between two huge trees.

Screenshot Walkthrough

Deshaan Treasure Map III

Deshaan Treasure Map III

  • Nort part of the map
  • From Mzithumz Wayshrine head east. Dirt mound location is in a small passage between rocks.

Screenshot Walkthrough

Deshaan Treasure Map IV

Deshaan Treasure Map IV

  • Southeastern part of Deshaan
  • Use Silent Mire Wayshrine and go west until you get close to the entrance to Mabrigash Burial Circle. When you cross the bridge, turn right and go up a small hill.

Screenshot Walkthrough

Deshaan Treasure Map V

Deshaan Treasure Map V

  • Southeastern Deshaan
  • Slightly to the west of Smuggler’s Slip, next to huge rocks.

Screenshot Walkthrough

Deshaan Treasure Map VI

Deshaan Treasure Map VI

  • Southeastern Deshaan
  • On a small island, between a rock and tree.

Screenshot Walkthrough

Deshaan CE Treasure Map

deshaan_ce_treasure_map

  • Central Deshaan, south of Mournhold and its wayshrine.
  • Go south of Mournhold Wayshrine until you reach the waterfall. Looking south from the waterfall you should see the scene from the TM sketch

Source from:http://teso.mmorpg-life.com/deshaan-treasure-map-locations-guide/