Season 4 Week 5 is one of those ARC Raiders trial weeks where the challenges look simple, but sloppy runs will bleed your stash faster than the leaderboard gives you credit for, especially if you’re burning through ARC Raiders Items just to force bad fights instead of planning clean routes. The goal isn’t only to finish each trial; it’s to stack points efficiently, get your 3 stars, and stay high enough on your 100-player board to secure promotion before the weekly reset hits.
How Trials Actually Work
Trials unlock at player level 15 and act like ARC Raiders’ weekly ranked grind outside normal progression. Each challenge has 3 star tiers based on points, and those stars feed into your weekly placement. Top 20 usually means a 2-rank jump, the next 30 get a smaller promotion, and the bottom 20 risk dropping down, so consistency matters more than one lucky god run.
| Trial | Best Focus | Why It Works |
| Loot Weapon Crates | Stella Montis or Riven Tides | Better route density and less wasted movement |
| Damage ARC in Red Lakes | Dam Battlegrounds | Multiple ARC enemy types patrol the area |
| Blaze Grenade Damage | Single high-value throw | The wording points to one grenade, not total grenade spam |
| Damage Shredders | Stella Montis | Shredders are tied to that map |
| Damage Bombardiers | Blue Gate or Buried City | Known patrol areas make hunting faster |
Weapon Crates: Stop Wandering and Start Routing
The weapon crate trial is the easiest one to fumble because players treat it like normal looting. Don’t. Pick Stella Montis or Riven Tides, load in light, and build your run around crate spawns instead of detouring for every shiny container. From what I’ve seen, the players who climb fastest aren’t the ones taking every fight; they’re the ones extracting after a clean crate loop before the raid turns into a third-party circus.
• Bring a cheap, reliable loadout so a failed run doesn’t tilt your whole session.
• Prioritize known weapon crate areas first, then loot side rooms only if the route is quiet.
• Leave early if your bags are good and your trial progress popped; greed is how raids go sideways.
• Avoid chasing distant gunfire unless you still need PvP damage for another objective.
Red Lakes Damage and the Blaze Grenade Trap
For the Red Lakes trial, head into Dam Battlegrounds and work the Red Lakes area for Snitches, Wasps, Hornets, Fireflies, and the Leaper that can patrol there. The trick is to farm damage, not instantly delete the first target you see. Tag safer flying units, reposition before you get boxed in, and don’t tunnel so hard on ARC health bars that another raider gets a free angle on you.
The Blaze Grenade trial is where the wording matters. It asks for damage with a blaze grenade, which strongly suggests your best attempt should come from one well-placed throw rather than tossing them randomly across a raid. Look for clustered ARC enemies, damaged raiders hiding in cover, or a bigger target that won’t immediately leave the burn zone. A bad throw is just lost economy; a patient throw can carry the whole star push.
Okay, Shredders and Bombardiers Are the Real Check
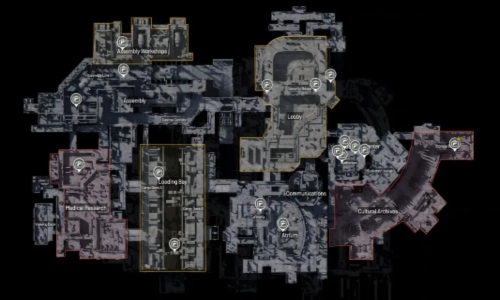
Shredders only spawning on Stella Montis makes that trial more about map selection than mechanical skill. Queue Day or Night on Stella Montis and check high-traffic POIs like Medical Research, Sandbox, Lobby, and Assembly. Don’t overcommit if a Shredder is sitting in an ugly angle with raiders nearby; reset, rotate, and take damage windows when the fight is actually yours.
Bombardiers are better hunted on Blue Gate or Buried City. On Buried City, check Marano Park and the parking lot near Hospital; on Blue Gate, look around Raider’s Refuge and the outer gates near Checkpoint. The draft advice about using two Wolfpack Grenades or a Hullcracker is the kind of detail worth keeping because it saves ammo and time, but I’d still say bring a backup weapon with steady DPS in case your explosive play whiffs or another squad interrupts.
What Most Players Get Wrong This Week
The biggest mistake is trying to finish every trial in one messy raid. Split them by map and intent: crate runs are fast and quiet, Red Lakes is controlled damage farming, Stella Montis is for Shredders, and Bombardiers deserve their own hunt. If you’re low on supplies, don’t panic-buy or overgear every attempt; plan your kit, repair what makes sense, and only buy ARC Items when it supports a real trial route rather than a rage queue. Play boring for 2 raids, then go loud when the objective demands it. That’s usually how the 3-star grind gets done without turning your stash into scrap.
